 By James
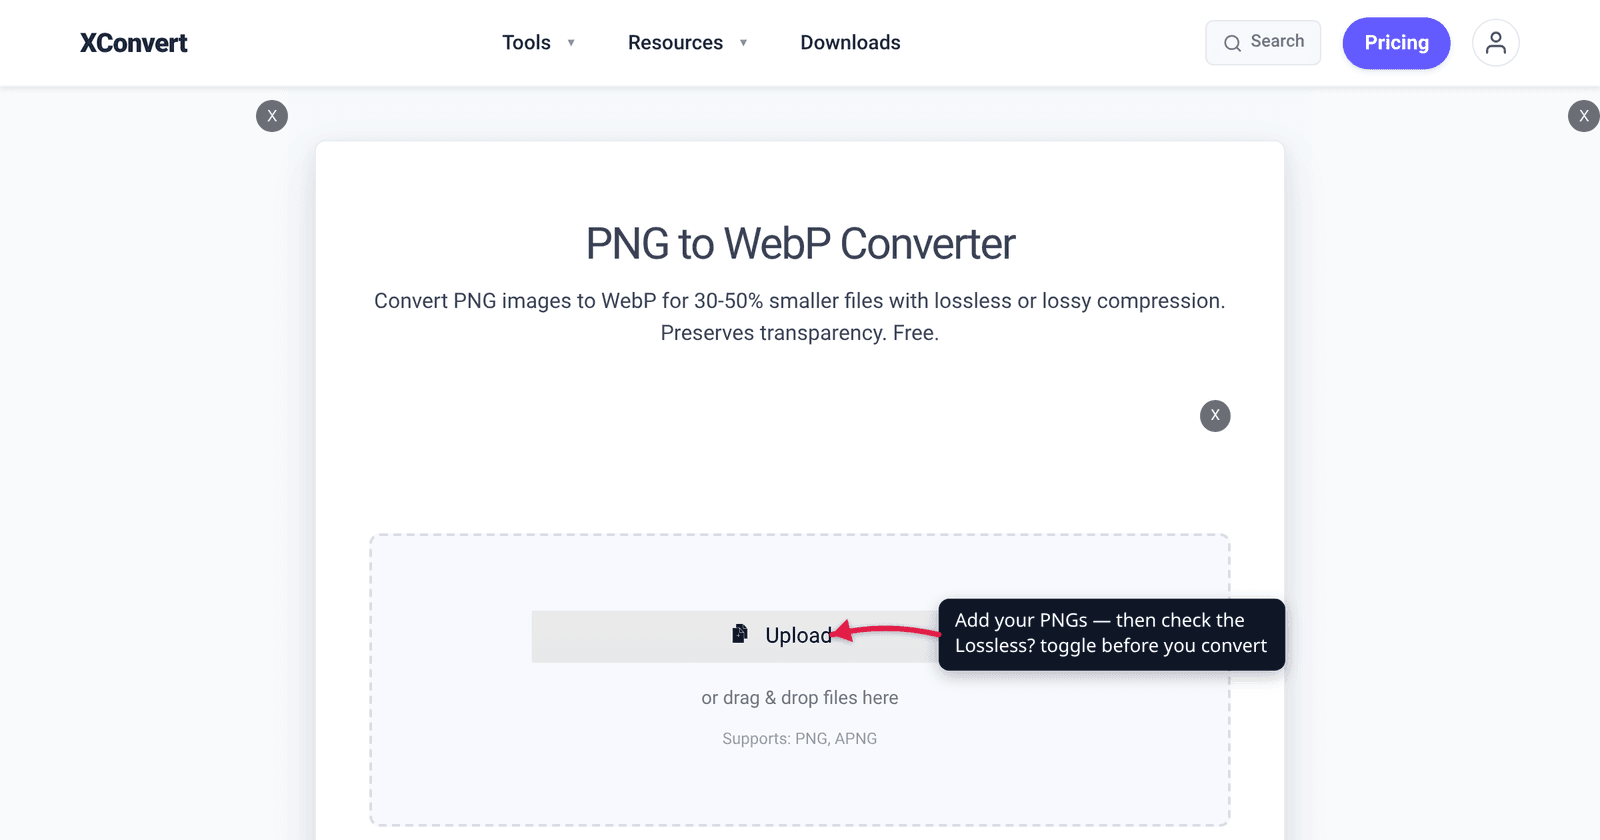
Almost everyone converting a PNG to WebP assumes the result is lossless. PNG is lossless, WebP has a lossless mode, so the conversion must preserve pixels — right? Open xconvert’s PNG to WebP converter, expand Advanced Options, and look at the toggle labelled Lossless?. It is sitting on No (Recommended). Your PNG is being re-encoded lossily by default, and for most images that is genuinely the better answer — but you should know it, because for a specific and predictable class of image it is the wrong one.
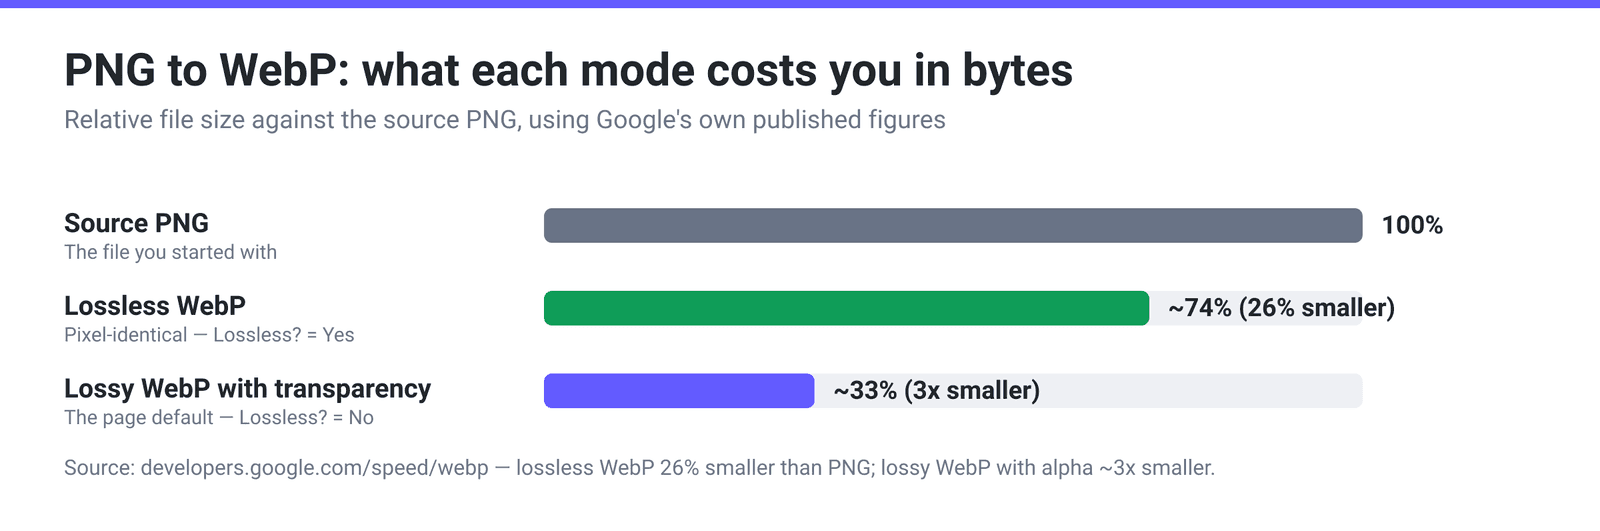
Quick answer: PNG to WebP is lossy by default on xconvert — the Lossless? toggle defaults to No (Recommended), with the Quality Preset on Very High, which encodes at quality 95. Leave it there for photographs, screenshots of photographic content, and anything with gradients. Switch Lossless? to Yes for flat-colour graphics, logos, icons, line art, pixel art, and screenshots full of small text, where lossy compression puts visible ringing around hard edges. Google’s own figures: lossless WebP is about 26% smaller than PNG and carries transparency for 22% additional bytes; lossy WebP with transparency is typically 3× smaller than the same PNG.
Jump to a section
- The default is lossy — and why that is defensible
- The numbers Google actually publishes
- Transparency is where the choice really bites
- How to decide in ten seconds
- Convert PNG to WebP on xconvert
- FAQ
The default is lossy — and why that is defensible
Two controls decide the outcome on this page, and they are in different groups, which is part of why the default surprises people.
- Lossless? —
YesorNo (Recommended). This is the one that decides whether pixels survive. It defaults to No. - Image Compression → Quality Preset — Highest, Very High (Recommended), High, Medium, Low, Very Low, Lowest. This is the fidelity dial for the lossy path. The presets map to fixed quality values: Highest 100, Very High 95, High 90, Medium 80, Low 70, Very Low 60, Lowest 50.
So the out-of-the-box conversion is lossy WebP at quality 95 — not “PNG, but smaller.”
That default is defensible for one blunt reason: at quality 95 the loss is not visible on the kind of image most people are converting, and the size difference between lossy-95 and lossless is large. A lossy encoder can discard high-frequency detail the eye does not track; a lossless encoder must reproduce sensor noise, JPEG artefacts baked into a screenshot, and dither patterns exactly, byte for byte. On a photograph, insisting on lossless means paying full price to preserve information nobody can see.
The failure case is equally predictable. Lossy WebP is a block-transform codec, and block transforms produce ringing — faint halos — along hard, high-contrast edges. Photographs have almost none of those. A logo, a UI screenshot, a chart, or a line drawing is made almost entirely of them. That is why the same default that is invisible on a hero photo shows up as fuzz around 11-pixel body text.
The numbers Google actually publishes
Google publishes two sets of figures for lossless WebP, and they look contradictory until you read the methodology.
| Claim | Figure | Compared against |
|---|---|---|
| Lossless WebP vs PNG (headline) | 26% smaller | PNG generally |
| Lossless WebP vs ZopfliPNG (study) | 23% better | PNGs already crushed with pngcrush + ZopfliPNG |
| Lossless WebP vs libpng (study) | 42% better | libpng at maximum quality (ImageMagick convert) |
| Lossless transparency | 22% additional bytes | Lossless WebP without alpha |
| Lossy WebP with transparency vs PNG | 3× smaller | The equivalent PNG |
| Lossy WebP vs JPEG | 25–34% smaller | JPEG at equal SSIM |
The 23% and 42% come from the same study, over the same corpus of 12,000 web images, and the gap between them is the whole point: how much you save depends on how well-optimised your PNG already was. If your PNG came straight out of an export dialog, expect the bigger end. If you already ran it through an optimiser, the WebP still wins — Google reports higher compression density for over 99% of tested web images — but by less.
That reframes the lossless-vs-lossy question. Lossless WebP is not a consolation prize; it is a genuine 23–42% saving that changes nothing about the picture. The lossy path is a further step down, worth taking when the content can absorb it.
Transparency is where the choice really bites
If your PNG has an alpha channel — and if it is a logo, icon, or UI asset, it almost certainly does — the two paths diverge much more sharply than they do on an opaque image.
Google’s published figures put lossless transparency at a cost of just 22% additional bytes over a lossless WebP without alpha. That is remarkably cheap; PNG’s own alpha handling is nowhere near that efficient, which is a large part of why transparent PNGs are so heavy. Go lossy instead and transparency-carrying WebP comes in at typically 3× smaller than the equivalent PNG. In the compression-density measurements from the same study, lossy WebP with alpha needed 1.92 bits per pixel against ZopfliPNG’s 5.05 on the web-image corpus.
The catch is that a transparent asset is usually exactly the content type lossy compression handles worst. A transparent PNG is typically a logo or icon — flat colour, hard edges, anti-aliased curves — and those anti-aliased edges are where ringing shows most, because the artefact appears against nothing rather than against more picture. A halo in a photograph hides in the texture. A halo around a logo sits on your page background in plain view.
So the honest reading of Google’s numbers: the 3× lossy-with-alpha saving is real, and it is most tempting on precisely the images that can least afford it. If the transparent asset is a photographic cut-out, take the 3×. If it is a logo, take the 22% and keep your edges.
How to decide in ten seconds
| Your image | Lossless? | Why |
|---|---|---|
| Photograph, hero image, product shot | No (default) | No hard edges to ring; quality 95 is invisible |
| Screenshot of a photo or video | No (default) | Content is already photographic |
| Logo, icon, favicon source | Yes | Flat colour and anti-aliased edges; ringing is visible on any background |
| UI screenshot with small text | Yes | Text is the worst case for block-transform artefacts |
| Chart, diagram, line art | Yes | Large flat areas compress superbly losslessly and ring badly lossily |
| Pixel art, sprites | Yes | Every pixel is deliberate; lossy destroys the aesthetic |
| Scanned document | Yes | Text edges again — and the flat background compresses well |
| Already-optimised 8-bit indexed PNG | Yes | The colours were already quantised; lossy re-encoding adds noise to flat areas without much size win |
If you cannot classify it, set Lossless? → Yes. You still get Google’s 23–42% saving, and the picture is guaranteed identical. Lossy is the optimisation you reach for once you know the content can take it.
Convert PNG to WebP on xconvert
- Open xconvert.com/convert-png-to-webp and click Upload, or drag your PNGs onto the drop zone. The page accepts PNG and APNG, and takes many files at once with the same settings applied to all of them.
- Open Advanced Options to reveal the controls.
- Find the Lossless? group. It opens on No (Recommended) — lossy. Switch it to Yes for graphics, text and transparency you care about; leave it for photographic content.
- If you stayed lossy, set the Quality Preset. Very High (Recommended) is quality 95 and is the sensible default; Medium (80) is a much smaller file that still holds up on photographs. Alternatively switch to Specific file size to aim at an exact KB or MB budget per image.
- Optionally use Image resolution to downscale at the same time — Resolution Percentage, a Preset Resolution, or an exact Width × Height.
- Click Convert and download.
Files are uploaded over an encrypted connection, processed on our servers, and deleted automatically a few hours later. No sign-up, no watermark.
For the general walkthrough of this conversion, see How to convert PNG to WebP; for where each format earns its place, PNG vs WebP vs JPG.
FAQ
Is converting PNG to WebP lossless?
Not by default. On xconvert the Lossless? control defaults to No (Recommended), so a PNG is re-encoded as lossy WebP at the Very High preset — quality 95. Set Lossless? → Yes if you need pixel-identical output. The confusion is understandable: PNG is a lossless format and WebP has a lossless mode, but the conversion between them is a choice, and the default is optimised for web delivery rather than fidelity.
Will I see the difference at the default setting?
On a photograph, almost certainly not — quality 95 is high enough that the discarded detail is not detail you were looking at. On a logo, a chart, or a screenshot of small text, quite possibly yes: lossy WebP is a block-transform codec, and block transforms leave faint halos along hard, high-contrast edges. Zoom to 200% and look at the boundary between a solid colour and its neighbour; if you can see fuzz that was not in the PNG, switch to lossless.
How much smaller is lossless WebP than PNG?
Google’s headline figure is 26% smaller. Its detailed study, across 12,000 web images, reports 23% better than ZopfliPNG and 42% better than libpng — the gap being how aggressively the PNG had already been optimised. If your PNG came straight from an export dialog, expect nearer the 42% end; if you already ran an optimiser over it, nearer 23%. Google reports WebP achieving higher compression density for over 99% of the web images tested.
Does WebP keep my PNG’s transparency in both modes?
Yes. WebP carries an alpha channel in lossless and lossy mode, which is the property that lets it replace transparent PNGs on the web. Google puts the cost of transparency in lossless WebP at 22% additional bytes, and lossy WebP with transparency at typically 3× smaller than the equivalent PNG. What changes between the modes is not whether transparency survives, but how clean the semi-transparent edge pixels stay.
Should I use lossless WebP for an already-compressed 8-bit PNG?
Yes. An indexed PNG — the output of pngquant or a “save for web” 8-bit export — has already had its colours quantised to a small palette, which means large flat regions and hard boundaries between them. That is the structure lossless compression eats for breakfast and lossy compression damages, adding faint noise into areas that were perfectly flat. You would be spending fidelity for very little extra saving.
What about the Quality Preset when Lossless is set to Yes?
With Lossless? → Yes the output is pixel-identical to the source regardless of which preset is selected — there is no fidelity left to trade. The preset only governs the lossy path. If you want a smaller file and lossless is not getting you there, the real levers are downscaling under Image resolution, or accepting lossy at a lower preset.
Sources
Last verified 2026-08-31.
- Google — WebP: An image format for the Web — “WebP lossless images are 26% smaller in size compared to PNGs”; “Lossless WebP supports transparency … at a cost of just 22% additional bytes”; “lossy WebP also supports transparency, typically providing 3× smaller file sizes compared to PNG”; “WebP lossy images are 25-34% smaller than comparable JPEG images at equivalent SSIM quality index.”
- Google — WebP Lossless and Alpha Study — “WebP lossless compression is shown to be 23% better than ZopfliPNG and 42% better than libpng”; 12,000 web images pre-optimised with pngcrush and ZopfliPNG; lossy WebP with alpha at 1.92 bpp against ZopfliPNG’s 5.05 bpp; higher compression density for over 99% of tested web images.
- xconvert PNG to WebP converter — the live control surface: the Lossless? group defaulting to No (Recommended), the Quality Preset ladder, Specific file size, and Image resolution. Preset-to-quality values are xconvert’s own encoder configuration.