 By James
Most GIF advice assumes you want to preserve quality. Sometimes you don’t. The GIF has to fit a 256 KB emoji slot, or a 2 MB forum cap, or a chat window where it will be displayed 200 px wide anyway — and the fastest way there is to decide, deliberately, what you are willing to make ugly. The useful question is not “how do I avoid quality loss” but “which damage buys the most bytes, and which one shows up first?” The answer surprises people: in a GIF the first casualty is not sharpness. It is banding.
Quick answer: The fastest single move is the default one — leave the GIF compressor on Max file size and either drag Max % of original well below its default of 75, or switch Size limit to Custom size value and type the number you need. The solver runs several encodes to land at or under it. If you want to steer the damage by hand, switch File Compression to Custom: resize buys the most bytes for the least ugliness (~75% smaller at half dimensions), palette reduction buys the next most and is what produces the banding, and dropping frames costs motion rather than picture. Counterintuitively, turning dither off makes the file smaller and the banding worse — which on a deliberate-degradation job is exactly the trade you want.
Jump to a section
- The fastest route: name a number
- What breaks first, and it isn’t sharpness
- The damage ladder
- Three things that look like wins and aren’t
- Reduce a GIF’s quality on purpose on xconvert
- FAQ
The fastest route: name a number
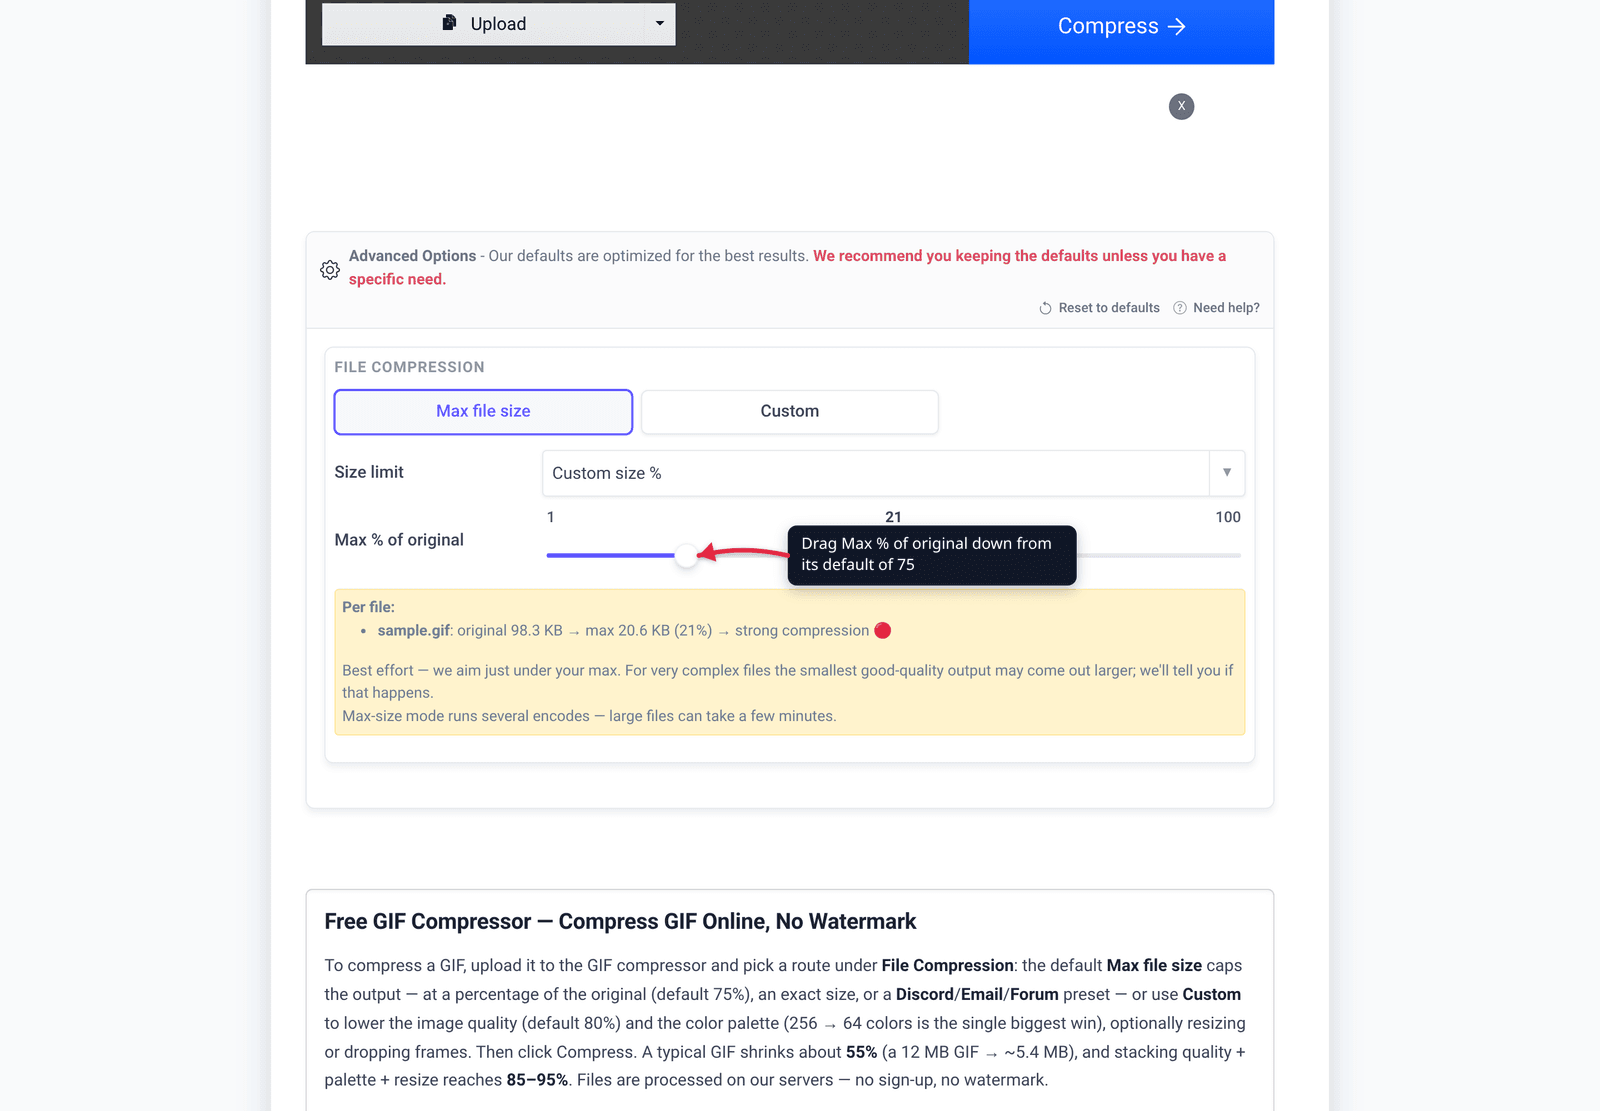
If your goal is just “much smaller, don’t care much how,” you do not need to touch the manual controls at all. The compressor opens on Max file size, with Size limit set to Custom size % and the Max % of original slider sitting at 75. Drag that slider down — 25, 15, 10 — and the tool runs a series of encodes searching for a result at or under your cap. Switch Size limit to Custom size value instead and you type an absolute figure with a B / KB / MB unit; the Discord (10 MB max), Email (25 MB max) and Forum (2 MB max) presets are the same mechanism with the number filled in.
How aggressive can you be before it stops working? From xconvert’s own analysis of every GIF-output job over a 30-day window — 73,688 of them — a target set at 30% or more of the GIF’s natural size is reached essentially every time, and even a target at 10% still succeeds 98.1% of the time. The failure mode is not the tool refusing; it is the output looking rough, which on this job is the point.
That same dataset shows something worth internalising: the biggest source of user dissatisfaction on the GIF compressor is not being aggressive enough. When output came back at 90–100% of the input size, only about a third of people downloaded it. Timidity is the more common mistake than overdoing it.
What breaks first, and it isn’t sharpness
Here is the mechanic that governs everything else. The GIF specification stores pixels as indices into a colour table, and the table’s size field is three bits wide, with the table holding 2^(value+1) entries. Three bits maxes out at 7, so the ceiling is 2⁸ = 256 colours — per frame, for the entire image.
That has a specific consequence. A JPEG pushed too hard goes blocky and soft: it loses detail. A GIF pushed too hard runs out of colours. Sharp edges, text and line art are made of a handful of very different colours, so they survive palette reduction almost untouched. Smooth gradients — a sky, a face lit from one side, a fade-to-black at the end of a loop — need dozens of near-identical shades, and when the palette can’t afford them those shades collapse into discrete steps. That is banding, and it is why a screen recording of a code editor can be crushed to a quarter of its size and still look crisp while a five-second sunset clip falls apart at the same setting.
So the practical rule for deliberate degradation: look at your content first. UI, text, line art, pixel art and flat-colour animation tolerate brutal settings. Photographic footage, gradients, fades and film grain do not, and will show you banding long before they show you softness.
One measured detail makes this stranger still. Automated quality metrics are essentially blind to banding: in our own testing an undithered, visibly banded GIF scored 0.126 SSIM better than the smooth ordered-dither version of the same clip at the same byte budget. The version a machine calls “higher quality” is the one your eye flags as broken. Trust your eyes over any score.
The damage ladder
Ranked by how many bytes each lever removes, with the visible price attached.
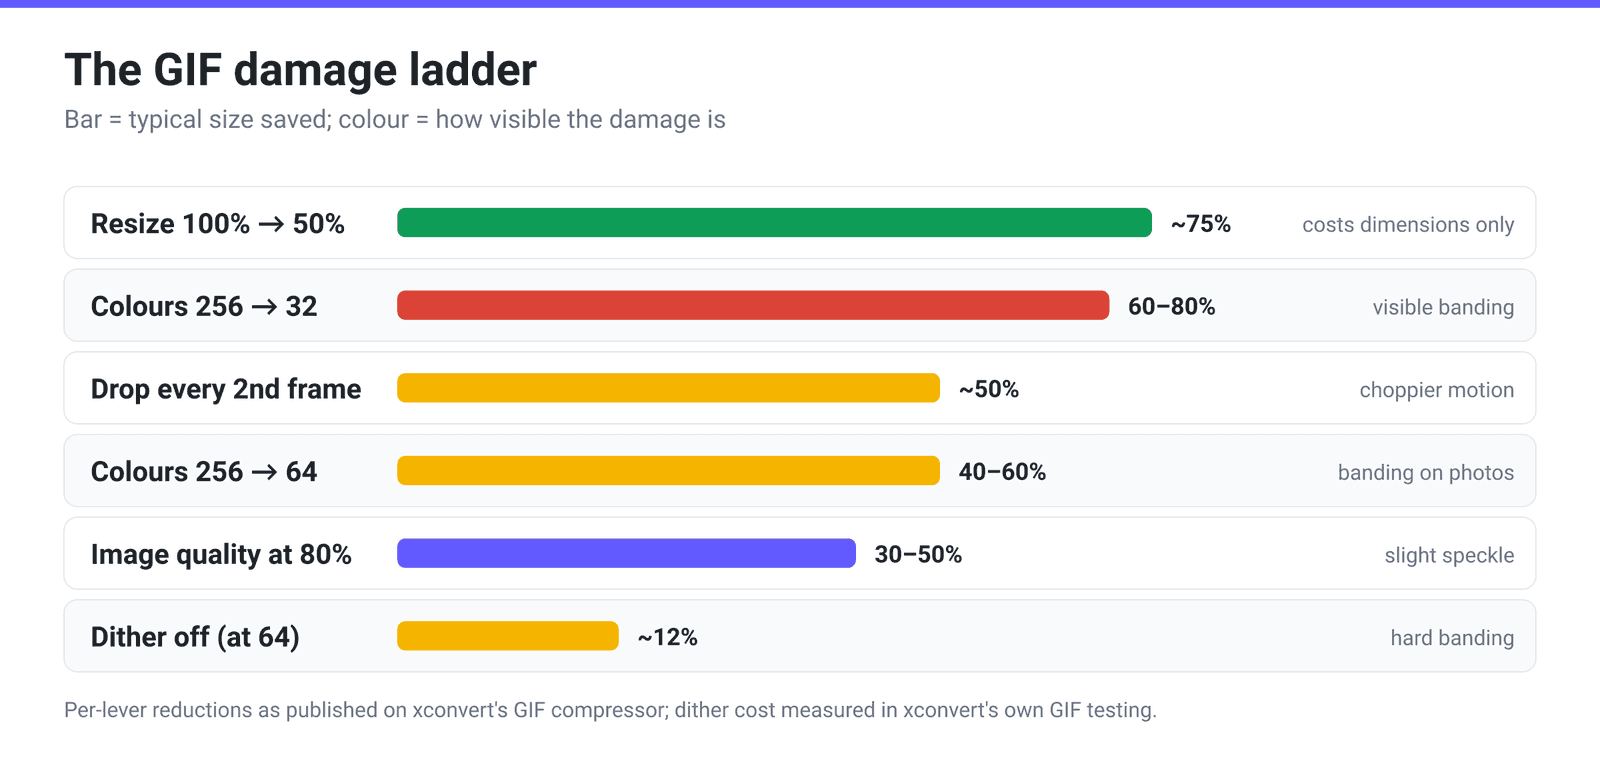
| Lever | Typical size reduction | What it costs you | Best on |
|---|---|---|---|
| Resize 100% → 50% | ~75% | Nothing but dimensions | Anything that will be displayed small anyway |
| Colours 256 → 32 or fewer | 60–80% | Visible banding | Pixel art, monochrome loops, flat illustration |
| Drop every 2nd frame | ~50% | Choppier motion | Static-camera screencasts, slow loops |
| Colours 256 → 64 | 40–60% | Banding on photos; fine on UI and line art | Screen recordings, line art |
| Image quality at 80% | 30–50% | Slight dithering / speckle | The general-purpose default |
| Dither off | ~12% at 64 colours | Hard banding in gradients | When you want small and don’t mind posterised |
| All of the above stacked | 85–95% | Obvious quality loss | Aggressive Discord and email targets |
Two things to read off that table. First, resizing is the only nearly-free lever — a GIF displayed at 320 px in a chat window gains nothing from being encoded at 640 px, so halving the dimensions is pure profit before you degrade anything. Do it first, every time.
Second, the levers compound. Resizing to 50%, dropping every other frame and cutting to 64 colours together take a 12 MB original well under 500 KB. You almost never need the most extreme setting on any single lever; you need three moderate ones.
Three things that look like wins and aren’t
Dither is not free. Dithering scatters pixels between two palette entries to fake the missing shades, which hides banding — but it also destroys the long runs of identical pixels that GIF’s compression depends on. We measured ordered dithering costing about +12% in bytes at 64 colours, and Floyd–Steinberg about +25% while also flickering between frames because it re-decides the pattern on each one. For animation, ordered is the right dither if you want one. And if your brief is “make it smaller on purpose,” turning dither off shrinks the file and degrades the picture in one move — a genuinely efficient trade when banding is acceptable.
Per-frame palettes are a trap. Letting every frame carry its own optimised colour table sounds like it should improve quality. In our testing it cost roughly three times the bytes for about 0.001 SSIM — a difference no one can see, at triple the price.
“Optimise” flags are not automatic wins. Running a general-purpose GIF optimiser over an already-encoded file can make things worse: we measured gifsicle -O1 applied to an ffmpeg-produced GIF making it 200% bigger. If a tool offers to “optimise” a GIF you have already compressed, check the byte count afterwards rather than assuming.
And don’t reach straight for the lowest frame rate. Dropping frames is a good lever, but there is a floor. Dropping every third frame is the sweet spot in our data — the Every 3rd frame setting deletes one frame in three and keeps the other two, it does not keep one in three. Pushing all the way down to 5 FPS lands in the worst-performing bucket — the motion reads as broken rather than merely economical, and you have spent your quality budget on the least convincing kind of damage.
Reduce a GIF’s quality on purpose on xconvert
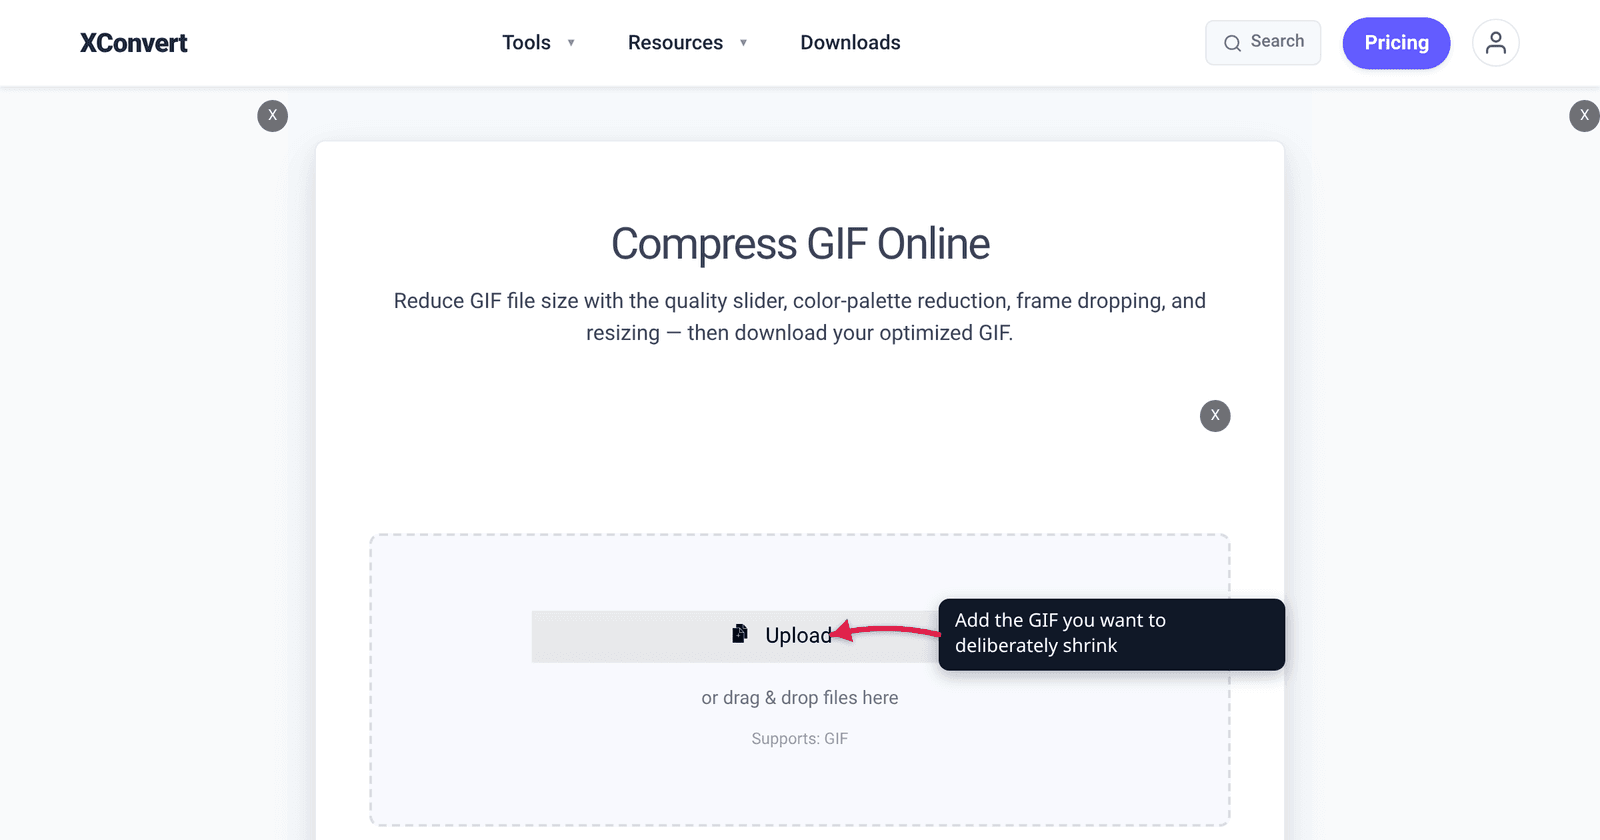
- Open xconvert.com/compress-gif and click Upload to add your GIF (from your computer, Google Drive, or Dropbox).
- The fast way: leave File Compression on Max file size and drag Max % of original down from its default of 75 — try 20 or 15. Or switch the Size limit dropdown to Custom size value and type an exact number with a B / KB / MB unit.
- The steered way: switch File Compression to Custom to unlock the manual levers, then work down the ladder — set Image resolution first, then Colors ▸ By Color Reduction + Dither (the Color Palette Size dropdown runs 256 down to 2, and the Dither toggle is right beside it), then Drop Frames ▸ Frames To Drop, then the Image Quality (%) slider.
- Click Compress, then download. Max-size mode runs several encodes, so a large file can take a few minutes.
Your file uploads over an encrypted connection, is processed on our servers, and is deleted automatically a few hours later. No sign-up, no watermark.
If you find you have gone too far, the companion piece works the other direction: make a GIF smaller without losing quality. And if you need a specific figure rather than a percentage, compress a GIF to a specific size covers the exact-target route.
FAQ
What’s the fastest way to make a GIF much smaller?
Drag Max % of original down. It is the default control on the compressor, it sits at 75, and there is nothing stopping you setting it to 20. The tool runs a series of encodes hunting for a result at or under your cap, and in our production data a target at 30% or more of the GIF’s natural size is reached essentially every time. You do not have to understand palettes or frame rates to use it.
What does a GIF actually look like when you push the quality down?
Banded, before it looks soft. GIF stores at most 256 colours per frame, so the first thing to break is smooth gradients — skies, skin tones, fades — which collapse into visible steps. Edges, text and line art hold up far longer, because they are made of a few strongly different colours. That is why screen recordings survive brutal settings and sunset footage does not.
Should I turn dithering off?
If you are degrading on purpose, often yes. Dither hides banding by scattering pixels between palette entries, but that scattering breaks up the repeated pixel runs the format compresses with — we measured ordered dither costing about 12% extra bytes at 64 colours, and Floyd–Steinberg about 25% plus visible flicker between frames. Turning it off makes the file smaller and the banding more obvious in one move. On flat-colour and UI content you may not even notice; on photographic content you certainly will.
Does dropping frames or reducing colours save more?
Reducing colours, usually, and it is the safer of the two on content with little motion. Cutting the palette from 256 to 64 typically takes 40–60% off; dropping every second frame takes about 50% but halves your motion. On a static-camera screencast, drop frames. On a busy clip where the motion is the content, cut colours instead — and resize before you do either.
Why did my GIF get bigger after I ran it through an optimiser?
Because “optimisation” flags are not free wins on a file that has already been encoded. We measured gifsicle -O1 run over an ffmpeg-produced GIF coming out 200% larger than the input. Different encoders make different structural choices, and a second pass can undo the first one’s efficiencies. Always check the resulting byte count instead of trusting the label.
How small can I go before the target stops being hit?
Further than you would expect. Across all 73,688 GIF-output jobs we analysed over 30 days, a target at 30% or more of the file’s natural size succeeded essentially always, and a target at 10% still landed 98.1% of the time. Below that the constraint becomes what the picture can survive, not what the encoder can reach — and the same data shows the more common regret is having been too cautious.
Sources
Last verified 2026-08-31.
- W3C — GIF89a specification — the Size of Global Color Table field is 3 bits and the table holds 2^(value+1) entries, giving the 256-colour-per-frame ceiling.
- xconvert GIF compressor — the live control set (Max file size with the Size limit dropdown and the Max % of original slider defaulting to 75; Custom mode’s Image Quality, Drop Frames, Image resolution and Colors panels) and the published per-lever size-reduction figures.
- xconvert production analysis of all 73,688 GIF-output workflows over a 30-day window — target-hit rates by ratio, the download-rate collapse on under-compressed output, the drop-every-third-frame sweet spot, the measured dither byte costs (ordered ≈ +12%, Floyd–Steinberg ≈ +25%), the per-frame-palette cost, the
gifsicle -O1inflation case, and the SSIM-versus-banding result.