 By Stephanie Taylor
You merged twelve holiday photos into a PDF and every landscape shot came out as a narrow strip stranded in the middle of a mostly-empty page. Or you changed one setting, and now the tops of everyone’s heads are missing. Both are the same problem wearing different clothes: your photo and your page are different shapes, and the converter has to resolve that mismatch somehow. It can leave blank space, or it can crop. Three controls decide which — and one of them makes the mismatch disappear entirely.
Quick answer: A4 portrait is a 1 : 1.414 rectangle; a typical phone photo is 4:3. Those do not fit, so Image placement decides what gives. Contained (the default) shrinks the photo until it fits and leaves the rest blank — on an A4 portrait page with the default Narrow margin, a landscape 4:3 photo leaves 49% of the printable area empty. Cover fills the page instead and crops away exactly the same 49%, off the sides. The real fixes, in order: set Page layout to match the photo’s orientation, set Paper size to Original, and set Margin to No margin (0"). Do all three on the image to PDF merger and you get no bars and no crop.
Jump to a section
- The page and the photo are different shapes
- Contained and Cover spend the same percentage
- What Margin and Image alignment actually do
- The settings that make the mismatch disappear
- Merge photos into a PDF on xconvert
- FAQ
The page and the photo are different shapes
Paper sizes and camera sensors were designed by different people for different reasons, and their proportions have never matched.
The W3C’s paged-media specification gives the standard page dimensions precisely: A4 is 210 mm wide and 297 mm high, US Letter is 8.5 × 11 inches. As width ÷ height that is 0.707 for A4 (the famous 1:√2 ratio that lets you halve the sheet and keep the proportions) and 0.773 for Letter.
Cameras use different ratios entirely:
- 4:3 — the shape most phone cameras produce by default. As a landscape frame that is 1.333 wide-to-tall; held upright it is 0.75.
- 3:2 — the classic 35 mm shape, still standard on DSLRs and mirrorless cameras. 1.5 landscape, 0.667 portrait.
- 16:9 — video frames, wide screenshots, many drone stills. 1.778 landscape, 0.563 portrait.
Now add the two defaults that trip people up. Page layout defaults to Portrait, and Margin defaults to Narrow (0.5"). Those margins take an inch off each dimension, so an A4 portrait page has a printable box of 184.6 × 271.6 mm — a shape of 0.68, taller and narrower than the paper itself.
Drop a 1.333-wide landscape photo into a 0.68-shaped box and something has to give. That is the entire phenomenon.
Contained and Cover spend the same percentage
Image placement has exactly two settings, and they are two answers to the same question.
- Contained (the default) scales the photo down until the whole of it fits inside the printable box. Nothing is lost; whatever the box has left over stays blank.
- Cover scales the photo up until it fills the box completely. No blank space; whatever hangs over the edges is cut off.
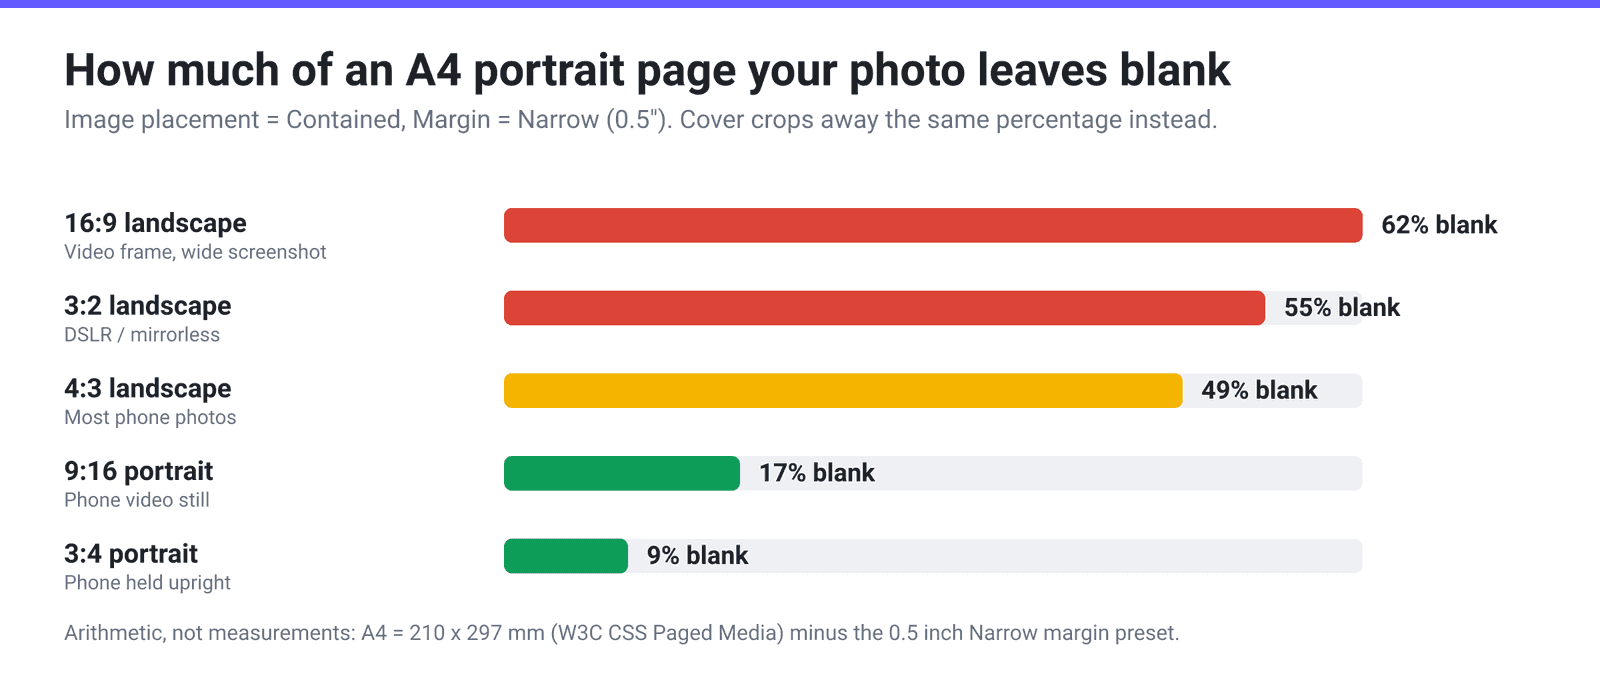
Here is the part nobody points out: the percentage is identical either way. Contained turns it into white space, Cover turns it into a crop. All the figures below are arithmetic — printable box dimensions divided by photo aspect ratio, using A4 with the default Narrow (0.5") margin — not estimates.
| Photo shape | On A4 portrait, Contained leaves blank | On A4 portrait, Cover crops away | On A4 landscape, Contained leaves blank |
|---|---|---|---|
| 4:3 landscape (most phone photos) | 49% | 49% of the width | 9% |
| 3:2 landscape (DSLR / mirrorless) | 55% | 55% of the width | 2% |
| 16:9 landscape (video frame, wide screenshot) | 62% | 62% of the width | 17% |
| 3:4 portrait (phone held upright) | 9% | 9% of the width | 49% |
| 9:16 portrait (phone video still) | 17% | 17% of the height | 62% |
Read the first and last columns together and the whole complaint resolves itself. On a portrait page, portrait photos waste 9–17% and look fine; landscape photos waste 49–62% and look broken. It was never about the photo — it was about the page’s orientation.
What Margin and Image alignment actually do
Two controls get blamed for this and neither is the culprit.
Margin does not cause the mismatch, but it makes it slightly worse or better, because it changes the shape of the printable box as well as its size. The presets are No margin (0"), Narrow (0.5") — the default — Moderate (0.75×1"), Normal (1") and Large (2×1"). Going from Narrow to Large shrinks an A4 portrait box from 184.6 × 271.6 mm to 108.4 × 246.2 mm, which is a much narrower shape and therefore a much worse fit for a landscape photo. If a photo already looks small on the page, a bigger margin is the wrong direction.
There is one pleasant arithmetic coincidence hiding in the Narrow preset: US Letter portrait minus 0.5" all round is exactly 7.5 × 10 inches — a perfect 3:4 rectangle. An upright 4:3 phone photo fits that box with zero blank space and zero crop; a landscape 4:3 photo does the same on Letter landscape. If your photos are straight off a phone, that combination is the tidiest one available without leaving standard paper.
Image alignment — Top, Center (the default) or Bottom — decides where the photo sits, not how big it is. In Contained mode it moves the leftover blank space rather than removing it: choose Top and the blank ends up below the photo instead of split above and below. It is genuinely useful when you plan to write or stamp something in the empty area, and useless as a fix for the empty area existing. In Cover mode it is worth trying for a different reason: alignment decides which part of the frame the page keeps, so if the crop is cutting off heads, Top is the setting to try first.
The settings that make the mismatch disappear
In descending order of how completely each one solves the problem:
- Set Paper size to Original. The dropdown’s first entry makes each page take the photo’s own proportions. There is then no mismatch to resolve — no bars, no crop, whatever shape you shot. Pair it with No margin (0") so nothing is inset. This is the right answer for a photo album, a portfolio, or anything that is going to be viewed on a screen rather than printed.
- Set Page layout to match your photos. If they are landscape, choose Landscape. A 4:3 photo goes from 49% blank to 9% blank; a 3:2 photo to 2%, which is essentially a perfect fit. Costs nothing and needs no other change.
- Reduce the Margin. Narrow (0.5") is already the smallest non-zero preset; No margin (0") gains you the last of the sheet. Only relevant if you are committed to a fixed paper size.
- Switch Image placement to Cover — carefully. This is the right choice only when filling the page matters more than seeing the whole photo, and when the subject is nowhere near the edges. On a landscape photo dropped onto a portrait page it removes half the width, which is almost never what you want.
A mixed batch — some landscape, some portrait — cannot be solved by a single orientation, because whichever you pick is wrong for half the set. Either use Paper size → Original, which adapts per image, or split the batch and run it twice. For a mixed set that has to end up as one document, the ordering trick in merge images into one PDF in the right order is worth reading first. And if the aim is to fit several photos per sheet rather than one, that is a different layout question entirely — see put multiple photos on one PDF page.
Merge photos into a PDF on xconvert
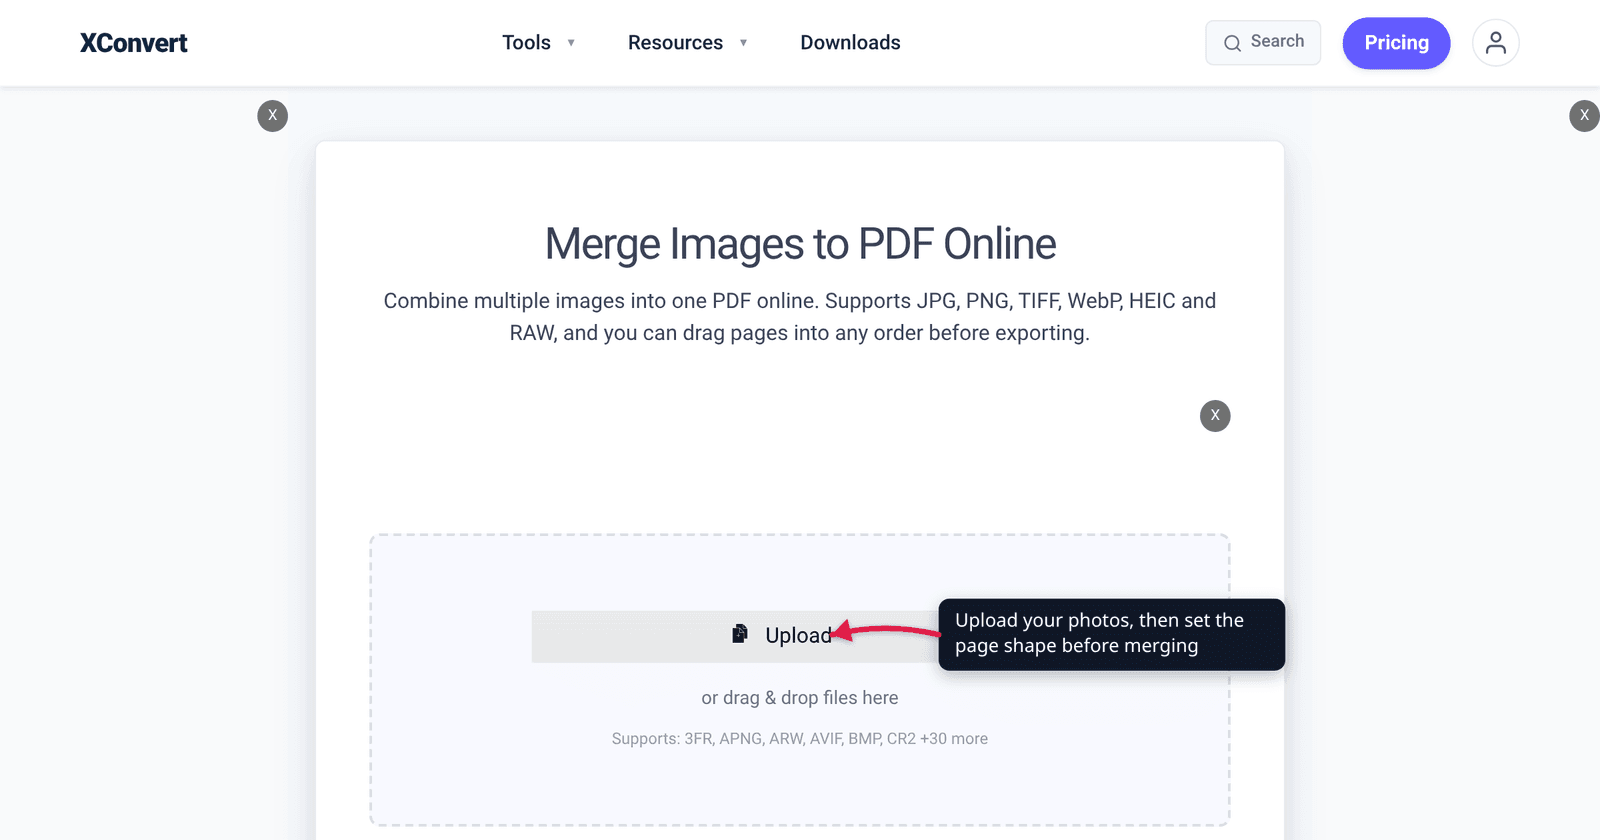
- Open the image to PDF merger and click Upload to add your photos. Leave Combine? on Single PDF for one document, or switch to Individual PDFs for one file per image.
- Open Advanced Options.
- Under Paper size, choose Original if you want each page to take the photo’s own shape. Otherwise pick your paper — A4 is the default — and set Page layout to Landscape or Portrait to match your photos.
- Under Image placement, leave Contained to keep the whole photo, or choose Cover to fill the page and accept the crop.
- Under Margin, choose No margin (0") to use the full sheet, or leave Narrow (0.5"). Under Image alignment, Center is the default; Top or Bottom pushes the leftover space to one side.
- Click Merge and download the PDF.
Your files upload over an encrypted connection, are processed on our servers, and are deleted automatically a few hours later. No sign-up, no watermark.
FAQ
Why is my photo cropped when I turn it into a PDF?
Because Image placement is set to Cover, which scales the photo until it fills the page and cuts off whatever overhangs. The amount removed is exactly the shape mismatch between photo and page: a landscape 4:3 photo on an A4 portrait page loses 49% of its width. Switch Image placement to Contained to keep the whole frame, and fix the underlying mismatch by setting Page layout to Landscape or Paper size to Original.
Why is there so much white space around my photo in the PDF?
Because Contained — the default — shrinks the photo until all of it fits, and blank space is what is left over. On an A4 portrait page with the default Narrow (0.5") margin, a landscape 4:3 photo can only fill 51% of the printable height. The fix is not a smaller margin; it is matching the page to the photo. Set Page layout to Landscape, or Paper size to Original.
What is the difference between Cover and Contained?
Contained fits the entire photo inside the page and leaves the remainder blank. Cover fills the entire page and crops the remainder off the photo. They resolve the same mismatch and they spend the same percentage doing it — the only question is whether you would rather lose page space or lose picture. Contained is the safe default; Cover suits full-bleed layouts where the subject sits well inside the frame.
How do I make the PDF page exactly the size of my photo?
Set Paper size to Original — the first entry in that dropdown — and Margin to No margin (0"). Each page then takes the proportions of the image it holds, which removes the mismatch instead of resolving it. This works per-image, so it is also the only setting that handles a mixed batch of landscape and portrait photos correctly in one pass.
Does changing Image alignment stop the cropping?
No. Image alignment (Top / Center / Bottom) controls where the photo sits, not how much of it you see. In Contained mode it moves the blank space to one end of the page; in Cover mode it changes which slice of the photo survives, which is useful if the crop is taking heads off — try Top — but it never reduces how much gets cropped. Only Image placement, Page layout and Paper size change that.
My portrait photos look fine but my landscape ones don’t. Why?
Because the page is portrait too. A4 portrait is a 0.707 rectangle and the printable area inside the default margins is 0.68 — close enough to an upright 3:4 phone photo that only about 9% of the page is left blank. A landscape photo is the opposite shape, so the same page leaves 49–62% empty depending on the camera. Set Page layout to Landscape for those, or Paper size to Original and stop thinking about it.
Sources
Last verified 2026-08-31.
- W3C — CSS Paged Media Module Level 3, page-size keywords — “A4: Equivalent to the size of ISO A4 media: 210 mm wide and 297 mm high”; “letter: Equivalent to the size of North American letter media: 8.5 inches wide and 11 inches high.” The page proportions used throughout.
- xconvert image to PDF merger — the live Image placement (Cover / Contained, Contained selected), Margin (No margin 0" / Narrow 0.5" / Moderate 0.75×1" / Normal 1" / Large 2×1", Narrow selected), Image alignment (Top / Center / Bottom, Center selected), Paper size, Page layout and Combine? controls and their defaults, read from the page on 2026-08-31.
- Blank-space and crop percentages in the table are arithmetic, not measurements: printable box = paper dimension minus twice the margin; the fitted image dimension = box dimension ÷ photo aspect ratio. Recompute them yourself from the two sources above.