 By Stephanie Taylor
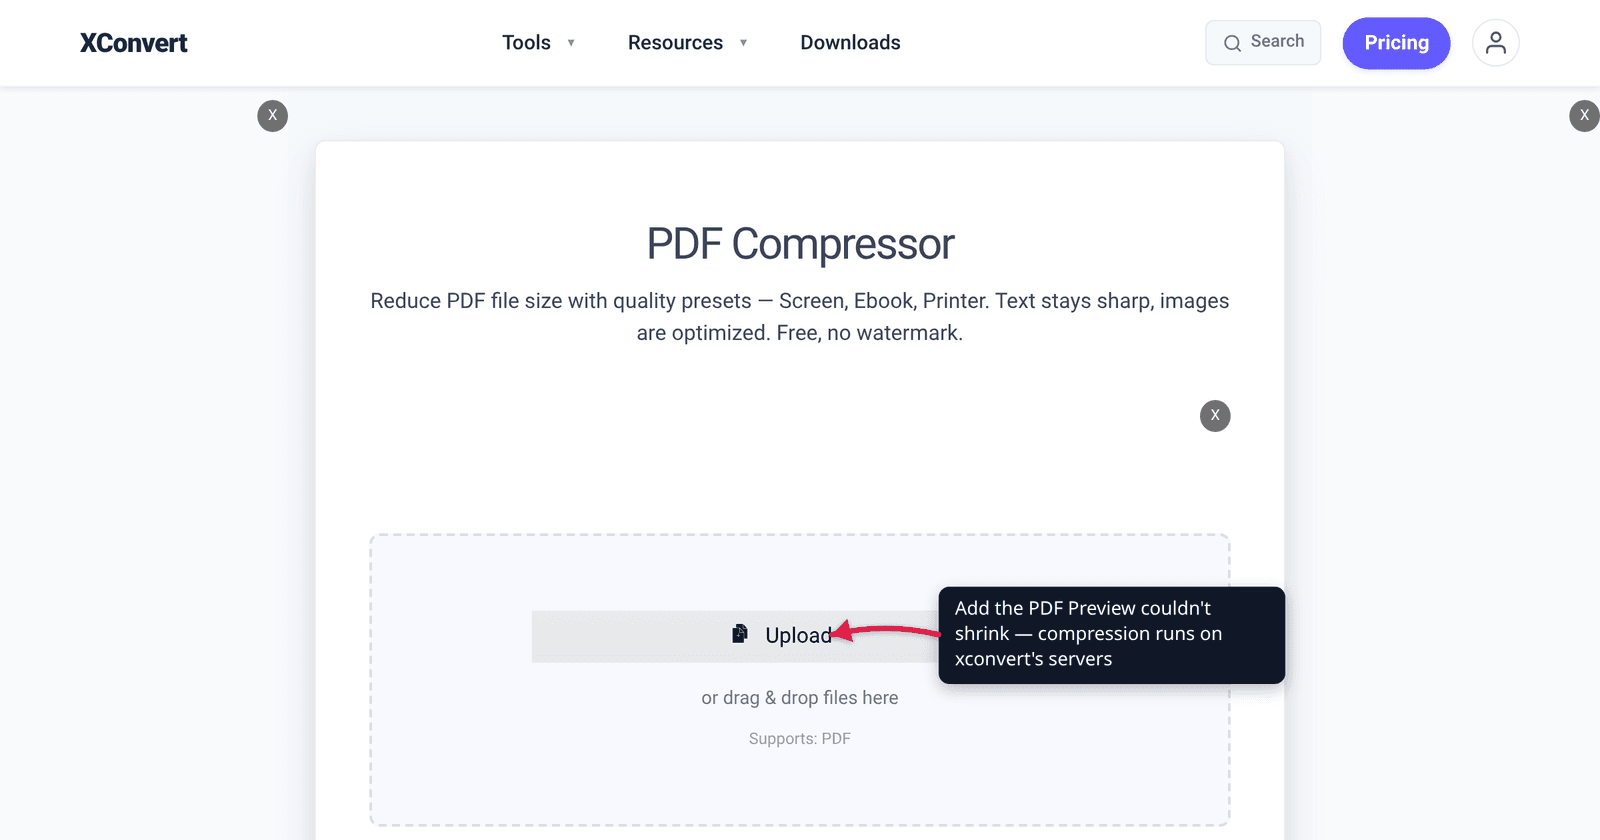
You opened a 40 MB scanned contract in Preview, chose File > Export, picked Reduce File Size from the Quartz Filter menu, and got back something that either barely shrank or looks like it was faxed twice. That is not you doing it wrong. Preview’s Reduce File Size is a single fixed filter with no strength control and no published parameters, and Apple’s own documentation warns that “the resulting file size and image quality may vary.” Here is what that filter actually does, the three export checkboxes almost nobody notices, how to build a version you can control without leaving macOS, and when to stop fighting it.
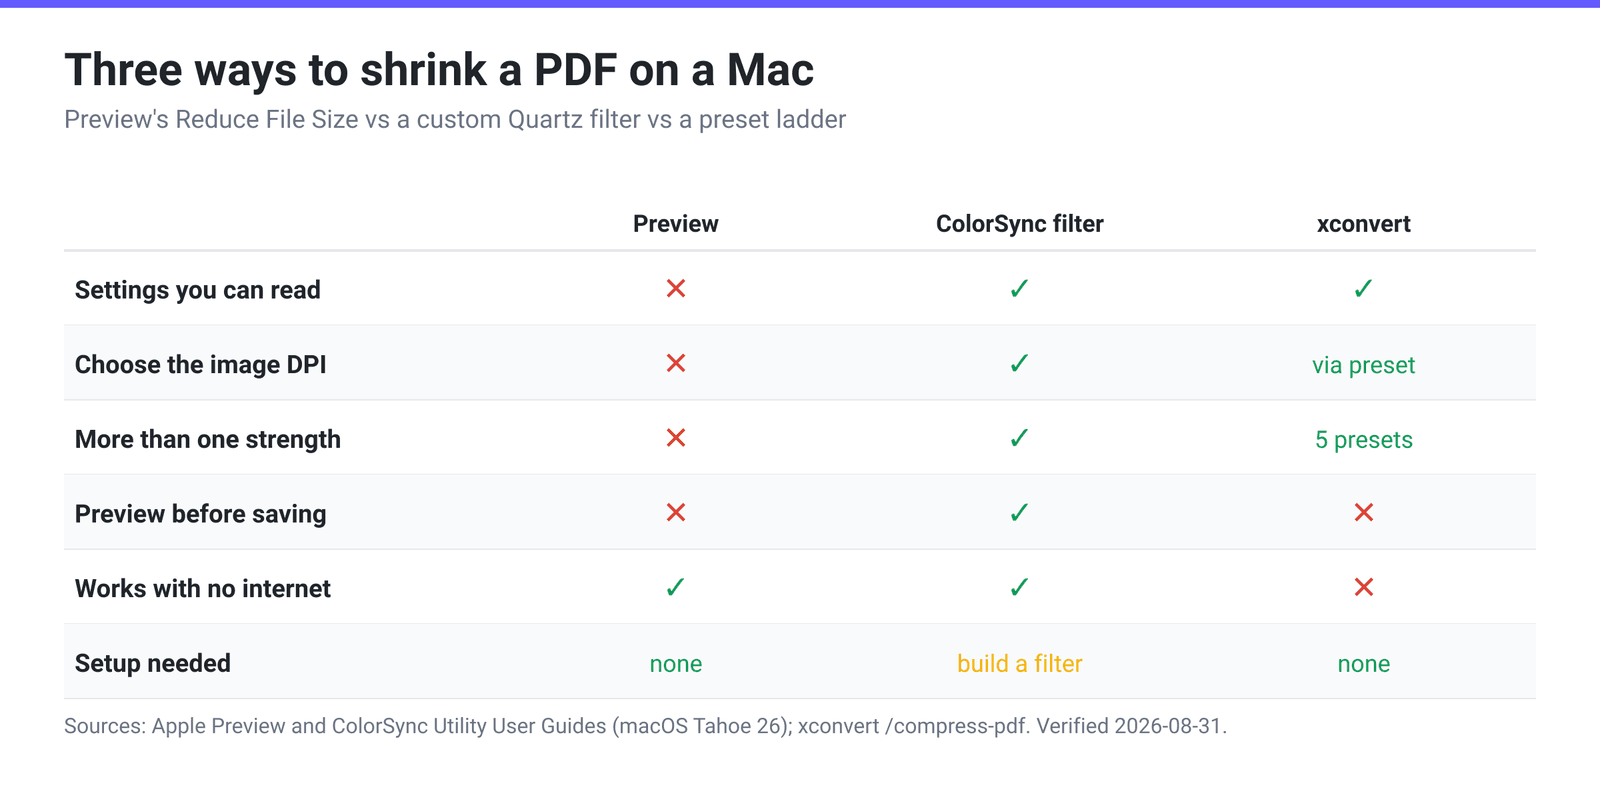
Quick answer: Reduce File Size is one preset Quartz filter applied in File > Export. It works by resampling and re-compressing the images inside the PDF, so a text-and-vector PDF barely moves while a scan gets visibly softer — with no dial to back off. Apple does not publish the filter’s settings. Your two real options: build a custom Quartz filter in ColorSync Utility where you set the image size, bit depth and compression yourself, or use a compressor that publishes a preset ladder, such as xconvert’s PDF compressor with its Screen (72 DPI) → Ebook (150 DPI) → Default → Prepress → Printer tiers, in that order on the control.
Jump to a section
- What “Reduce File Size” actually is
- The three export checkboxes almost nobody notices
- Why the result is unpredictable
- Build your own Quartz filter in ColorSync Utility
- The alternative: a documented preset ladder
- Compress a PDF on xconvert
- FAQ
What “Reduce File Size” actually is
It is a Quartz filter — a small macOS document describing transformations applied to a PDF as it is written out. Apple’s Preview User Guide says where it lives: open the PDF, choose File > Export, and “in the Quartz Filter pop-up menu, choose Reduce File Size.”
The same pop-up menu holds the decorative filters — Black & White, Sepia Tone and the rest. Reduce File Size sits in that list because it is built the same way, not because it is a compression engine: one filter, one set of values, applied identically to a five-page invoice and a 300-page scanned deposition.
What can a Quartz filter change? Apple documents the component types in the ColorSync Utility User Guide, where filters are actually authored:
- an Image Effects Component to “change the size, bit depth, interpolation and compression settings for the images in your file”
- a PDF Retouch Component to “set how monochrome data is encoded, whether images are interpolated and whether to create PDF/X‑3 documents”
- a Color Management Component for colour modifications
- Domain Information, which “specif[ies] where the filter can be used” — in apps, PDF workflows or the Print dialog
Note what is on that list and what is not: every size-related lever acts on images. That single fact explains most of the confusion. A PDF exported from Word or Pages is text, vectors and fonts — there are no images for the filter to shrink, so it comes back roughly the same size. A scanned PDF is a stack of full-page photographs, so the filter has everything to work on and the softening is immediately visible.
The three export checkboxes almost nobody notices
Apple’s guide documents a second route in the very same Export sheet, separate from the Quartz Filter menu. Most Mac guides never mention it.
| Checkbox | What Apple says it does | Does it shrink the file? |
|---|---|---|
| Create Linearized PDF | “Optimize the PDF for fast loading and viewing in web browsers.” | No. Linearizing reorders the file so a browser can render page 1 before the rest arrives. It is a delivery optimisation, not a compression one. |
| Optimize images for screen | “Optimize images for screen viewing to reduce file size.” | Yes — this is the size lever, and again it only touches images. |
| Save images as JPEG | “Convert images to JPEG format, which uses image compression.” | Yes, by re-encoding embedded images as JPEG. Lossy, and a second lossy pass over an image that was already JPEG. |
Apple’s UK edition of the guide spells the first two “Create Linearised PDF” and “Optimise images for screen”; the wording is otherwise identical.
Two consequences. If you have been ticking Create Linearized PDF hoping for a smaller file, it was never going to give you one. And Save images as JPEG is the checkbox most likely to ruin a scan of text: JPEG’s ringing artifacts cluster on high-contrast edges, which is what black type on white paper is made of.
Why the result is unpredictable
Apple attaches a note to the whole procedure: “When compressed, the PDF may be of lower quality than the original. The resulting file size and image quality may vary depending on the options you select.”
It is accurate, because none of the following is exposed to you:
- The target resolution. Apple does not publish the DPI or scale factor the stock filter downsamples to. Figures circulate on the web; they are not in Apple’s documentation, and this article will not repeat them as if they were.
- The JPEG quality. Same story — no published value.
- A strength control. There is one Reduce File Size entry, not a light/medium/heavy set. Your only remaining move is to run it again on the output, stacking a second lossy pass on the first.
So when the same command produces a 90% saving on a photo brochure and a 2% saving on a 200-page report, nothing is broken — you fed one fixed image-processing recipe two documents that had wildly different amounts of image data in them.
Build your own Quartz filter in ColorSync Utility
If you want to stay entirely on the Mac, this is the real answer, and it is a documented Apple workflow rather than a hack. ColorSync Utility (Applications ▸ Utilities) is where Quartz filters are authored: click Filters in the toolbar, click + in the lower-left corner and name your filter, then click the + beside its name and choose Add Image Effects Component to “change the size, bit depth, interpolation and compression settings for the images in your file.” Add Domain Information controls where the filter shows up — apps, PDF workflows or the Print dialog.
Two details from Apple’s documentation that matter here:
- Filters can be locked. “If the filter has [a padlock] next to it, you can’t edit that filter. You can, however, copy a locked filter and edit the copy.” So the fastest route is often to duplicate an existing filter and change its image settings rather than build one from scratch.
- You can preview before committing. ColorSync Utility will open a PDF directly, let you choose a filter from the pop-up menu at the bottom of the window, and show its effect page by page — “the effects of that filter are reflected in the window, but the file isn’t modified.” Click Apply only when you’re happy. That is a genuine advantage over Preview, where you find out after you save.
The cost is setup: you are hand-authoring an image-processing recipe on every Mac you use. For a one-off contract that has to be under 10 MB by lunchtime, it’s overkill.
The alternative: a documented preset ladder
The other way out is a compressor that publishes its targets, so “smaller” and “how much smaller” stop being a surprise. The preset names below come from a long-standing PDF-distiller convention that Ghostscript’s documentation defines by image resolution, and they are the five levels the xconvert PDF compressor exposes:
| Preset | Colour/grey image target | Best for |
|---|---|---|
| Screen (Best) | 72 DPI | Email, web embeds, on-screen review — smallest output |
| Ebook | 150 DPI | The balanced choice; scans stay legible when printed |
| Default | General-purpose | Ghostscript describes it as “useful across a wide variety of uses, possibly at the expense of a larger output file” |
| Prepress | 300 DPI | Commercial printing, with colour preserved |
| Printer | 300 DPI | Office laser printing |
Rows are in the order the Compression Type control lists them. Note that Prepress and Printer carry the same 300 DPI image resolution — the difference between them is colour handling, not sharpness — and that Ghostscript leaves image downsampling off for both, which is why neither shrinks a scan much.
That ladder is the thing Preview does not give you. If Screen goes too far on a scan, move up a rung to Ebook and re-run the original — not the already-degraded output. And because the targets are stated in DPI you can reason about the result in advance: a 200 DPI scan fed to the 150 DPI Ebook preset loses a little detail; the same scan fed to the 300 DPI Printer preset loses essentially none, and will not shrink much either.
Compress a PDF on xconvert
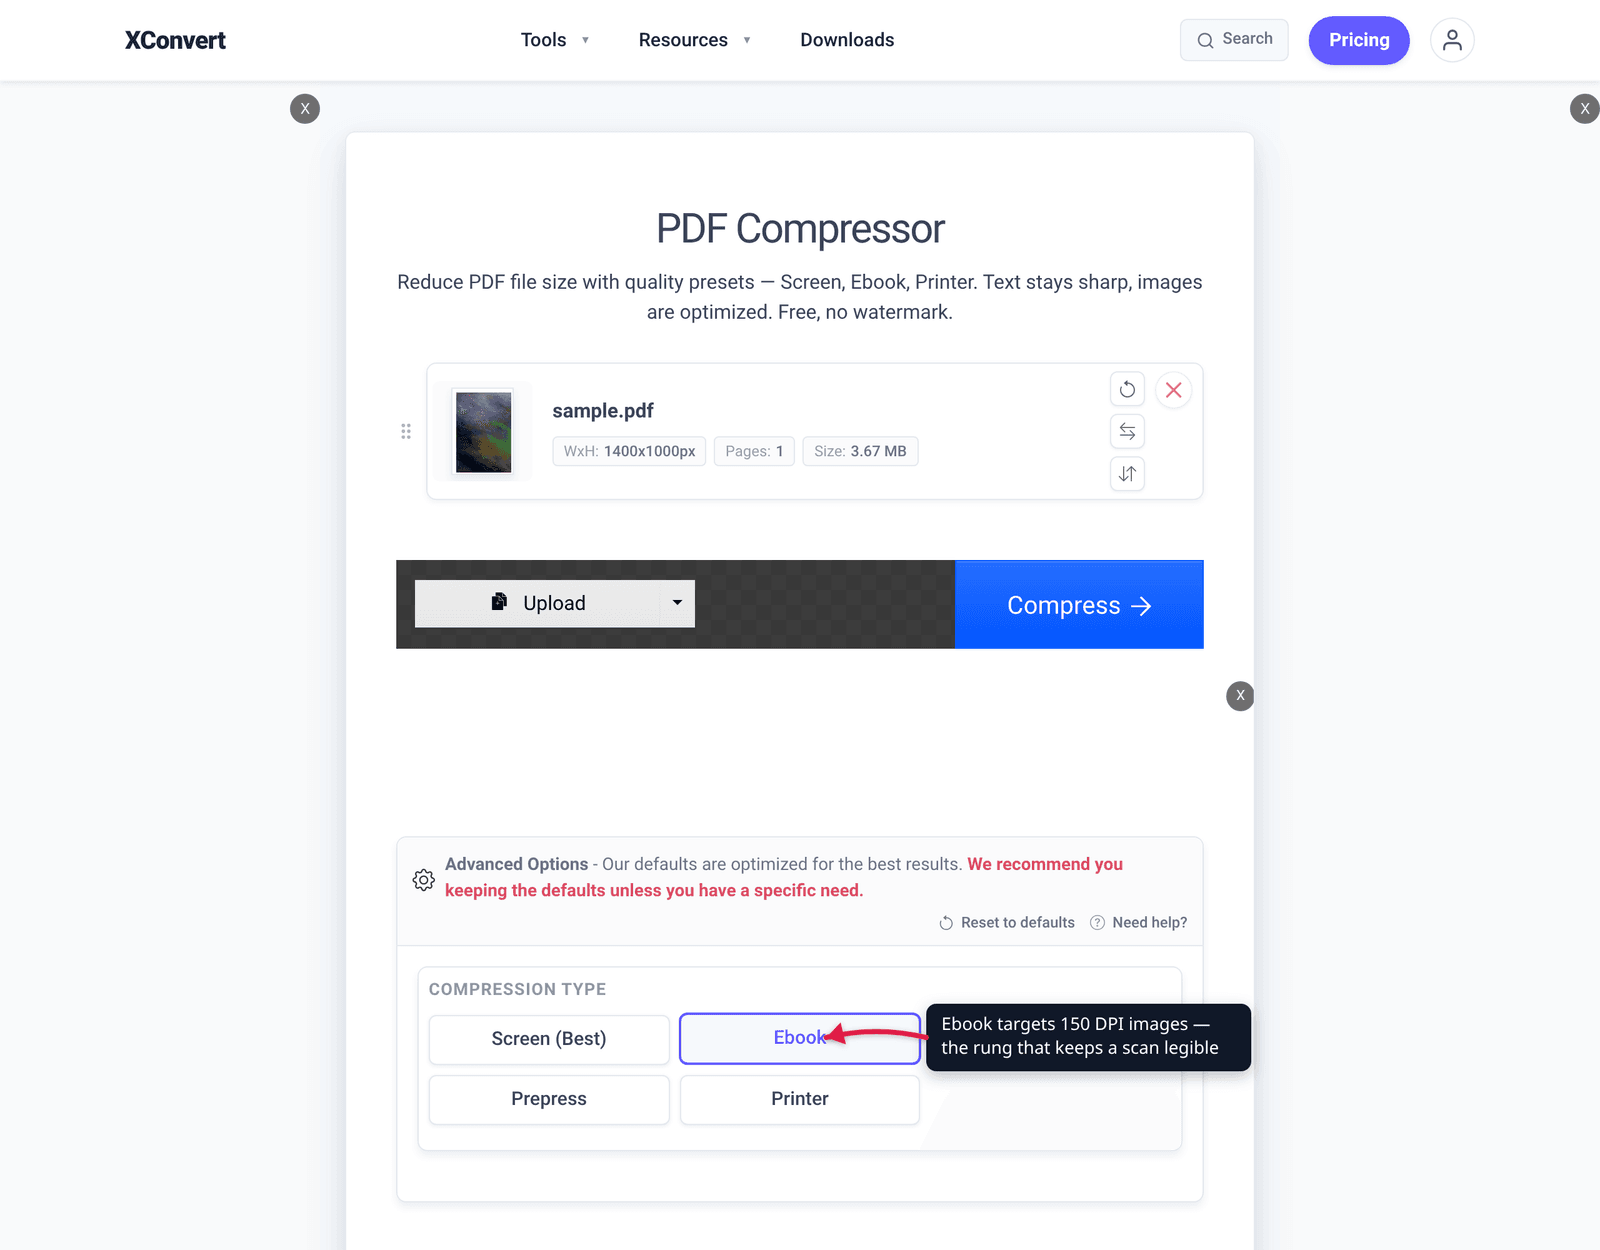
- Open xconvert.com/compress-pdf and click Upload to add your PDF (from your computer, Google Drive, or Dropbox). Batch is supported, and every file in the batch uses the same preset.
- Open Advanced Options (the gear icon) to reveal the controls.
- Under Compression Type, pick your rung. The control lists them Screen (Best), Ebook, Default, Prepress, Printer — Screen for the smallest file, Ebook for the balanced 150 DPI result, Default for general use, and Prepress or Printer (both 300 DPI) when print resolution has to survive.
- There is no separate quality slider — each preset bundles its own image downsampling and re-encoding. If the output is still too big, re-run the original file one rung stronger (Ebook → Screen) rather than compressing the compressed copy.
- Click Compress, then download.
Your file uploads over an encrypted connection, is processed on our servers, and is deleted automatically a few hours later. No watermark, no sign-up.
If the file still will not fit, the problem is usually page count rather than per-page weight — split the PDF and send it in parts. And if you want the full picture of what does and doesn’t shrink, compress a PDF without losing quality and why is my scanned PDF so big cover the underlying mechanics.
FAQ
Where is Reduce File Size in Preview?
Open the PDF in Preview, choose File > Export (not File > Save), then open the Quartz Filter pop-up menu in the export sheet and choose Reduce File Size. Click Save. If you keep the same filename, Preview asks whether to replace the original — pick a new name instead, so you still have the untouched file to try again from.
Why did Preview’s Reduce File Size make my scan blurry?
Because the filter’s size levers act on images, and a scanned page is one big image. Apple describes the relevant component as changing “the size, bit depth, interpolation and compression settings for the images in your file,” and the related export checkbox says “Save images as JPEG.” Downsampling plus JPEG re-encoding is exactly what softens scanned type, and there is no strength setting to dial back. For scans, a 150 DPI target such as the Ebook preset is usually the lowest that still prints legibly.
Why did my PDF barely shrink — or come out bigger?
If the PDF is text, vectors and fonts — anything exported from Word, Pages or a LaTeX build — there are no images for the filter to act on, so there is almost nothing to remove. If the images are already at or below the filter’s internal target, or already efficiently compressed, re-encoding them cannot help and can add bytes. And if you ticked Create Linearized PDF, note that Apple describes it as optimising “for fast loading and viewing in web browsers” — it is not a compression option at all.
Can I change how hard Preview compresses?
Not in Preview. The Quartz Filter menu offers Reduce File Size as a single entry with no parameters, and Apple does not publish the values inside it. To get a control, author your own filter in ColorSync Utility (Filters ▸ + ▸ Add Image Effects Component), where you set the size, bit depth, interpolation and compression yourself. Apple notes that locked filters can’t be edited directly but can be copied and the copy edited.
Does compressing in Preview destroy the searchable text?
No. Every size-related component Apple documents operates on the images in the file, not on text runs, so a born-digital PDF keeps its text layer and stays selectable. A scan is a different case: unless OCR was run first, it never had a text layer to lose. Compressing a scan does not remove searchable text — it just doesn’t create any.
What’s the Mac equivalent of Acrobat’s “Reduce File Size” with a target?
There isn’t one built in. Preview gives you a single fixed filter and a warning that results “may vary.” The closest native equivalent is a hand-built ColorSync filter; the closest zero-setup one is a preset ladder with published DPI targets, like the xconvert PDF compressor.
Sources
Last verified 2026-08-31.
- Apple — Reduce the size of a PDF in Preview on Mac (macOS Tahoe 26 edition) — the File > Export ▸ Quartz Filter ▸ Reduce File Size procedure, the three export checkboxes and their descriptions, and Apple’s “results may vary” quality note.
- Apple — Add or modify Quartz filters in ColorSync Utility on Mac — the filter component types (Image Effects, PDF Retouch, Color Management, Domain Information) and the locked-filter copy-to-edit behaviour.
- Apple — Modify PDF files with Quartz filters in ColorSync Utility on Mac — previewing a filter’s effect page by page before applying it.
- Apple — Add effects to a PDF in Preview on Mac — confirms Reduce File Size shares the Quartz Filter menu with the colour-effect filters.
- Ghostscript — Vector devices / PDFSETTINGS — the screen / ebook / printer / prepress / default preset definitions and the distiller-parameters table giving ColorImageResolution as 72 (default), 72 (screen), 150 (ebook), 300 (printer) and 300 (prepress), with DownsampleColorImages true only for screen and ebook.
- xconvert PDF compressor — the five Compression Type presets available on the tool.