 By Stephanie Taylor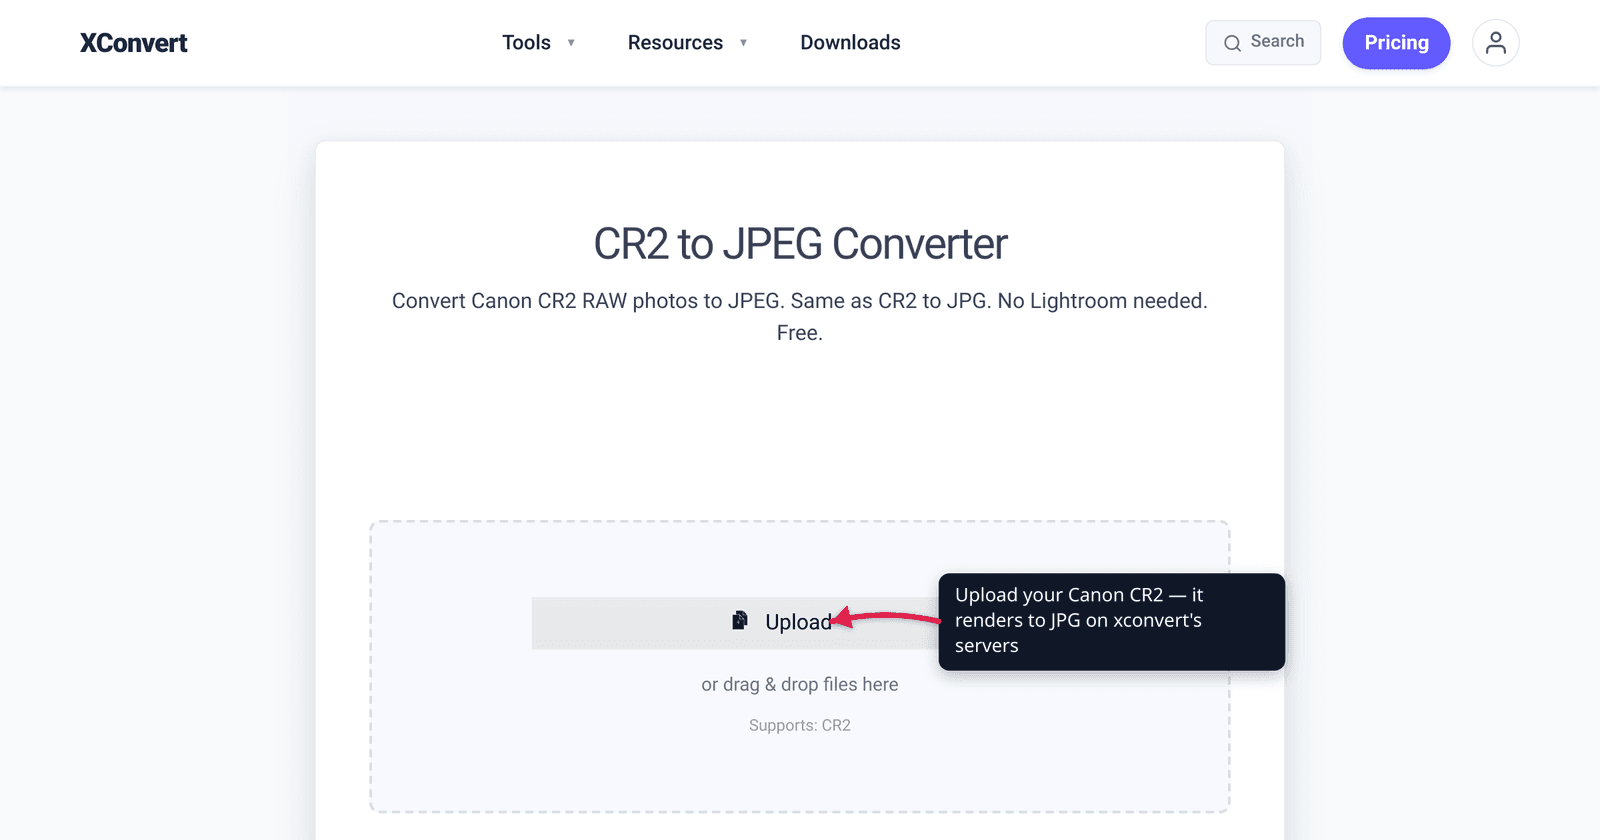
You pull a card off a Canon DSLR, double-click a .CR2 to send it to a client — and your photo viewer shows a blank thumbnail or an error. That’s not a corrupt file. CR2 is Canon’s RAW format, and a RAW file isn’t a finished picture: it’s the unprocessed data straight off the sensor, which most apps can’t render. Converting it to JPG produces a universal, much smaller image that opens everywhere. This guide covers what CR2 is, what you gain and lose in the conversion, and how to do it — verified against Canon’s documentation and the RAW-format references.
Quick answer: CR2 (Canon RAW v2) is the RAW format used by Canon DSLRs from 2004 (EOS-1D Mark II) until 2018, when CR3 replaced it. A RAW file holds raw sensor data that must be demosaiced and rendered before it’s a viewable picture, so it won’t open in most apps. Convert CR2 → JPG for a universal, much smaller image: drop the file into the xconvert CR2 to JPEG converter, and convert. JPG is 8-bit and lossy, so keep the original CR2 for any serious editing — convert a copy for sharing.
Jump to a section
- What a CR2 file actually is
- Why CR2 won’t open — and why JPG does
- What you lose converting CR2 to JPG
- Canon’s free route: Digital Photo Professional
- Convert CR2 to JPG on xconvert
- FAQ
- Sources
What a CR2 file actually is
CR2 stands for Canon RAW version 2. It’s the proprietary RAW format Canon introduced in 2004 with the EOS-1D Mark II, replacing the older CRW format, and it stayed Canon’s primary RAW format across a generation of DSLRs (the 5D Mark III and Mark IV, the EOS 5DS/5DS R, and many Rebel/EOS bodies) until 2018, when Canon launched its mirrorless EOS R system and switched to the newer CR3 format.
Two things matter about what’s inside it:
- It’s a RAW sensor dump, not a picture. A CR2 stores the data read directly off the sensor — typically 12 or 14 bits per channel — before the camera applies white balance, color, sharpening, contrast, or JPEG compression. To become a viewable image it must go through raw development: demosaicing (interpolating full color from the sensor’s Bayer color-filter mosaic) plus tone, white-balance, and color processing. That’s the step a normal photo viewer can’t do.
- It’s built on TIFF. Structurally, CR2 is based on the TIFF (Tagged Image File Format) container with Canon-specific lossless-JPEG compression. Knowing the CR2 → CR3 split matters because CR3 is a completely different container (ISO Base Media File Format, the same family as MP4), so “open my Canon RAW” tools don’t always handle both — check which your camera produces. If yours are CR3, see the same conversion idea applied to the newer format below.
If you shoot more than one Canon body, or a mix of brands, the bulk angle is covered separately in batch-convert RAW photos to JPG — this article is the single Canon-CR2 walkthrough.
Why CR2 won’t open — and why JPG does
RAW is the right format for editing and archiving, and the wrong format for sharing. Three concrete reasons CR2 fails the moment it leaves your camera, and JPG fixes each:
- Compatibility. CR2 is proprietary and camera-specific. Most email clients, web upload forms, chat apps, browsers, and document editors don’t recognize it — they show a blank thumbnail or reject the extension. JPG opens on every phone, browser, OS, and app on earth.
- Size. A CR2 carries full-bit-depth sensor data and is several times larger than the JPG rendered from the same frame. For email attachments, web uploads, and messaging caps, the JPG is far smaller. (To shrink the JPG further, run it through the xconvert Image Compressor afterward.)
- It’s already what you saw. The preview on the back of your camera is a JPG rendered from the RAW. Converting to JPG just makes that finished, viewable version a real file.
So the honest framing: convert CR2 → JPG to view, send, or upload a photo. The JPG is what your recipient needs.
What you lose converting CR2 to JPG
This is the part the “convert it and delete the RAW” tutorials skip. A JPG is an 8-bit, lossy format. Your CR2 holds 12–14 bits per channel of sensor data; flattening that to 8-bit JPG permanently discards the editing headroom RAW gives you:
- Highlight and shadow recovery. RAW’s extra bit depth lets you pull detail back out of a blown sky or a crushed shadow. Once it’s an 8-bit JPG, that latitude is largely gone.
- White-balance latitude. A RAW file lets you reset white balance after the fact as if you’d set it in-camera. A JPG bakes white balance in — big corrections start to look unnatural.
- Lossy compression. JPG throws away image data to shrink the file. At a high quality setting it’s visually indistinguishable from the RAW render for normal viewing and printing — but it’s not the full data, and repeatedly re-saving compounds the loss.
The takeaway is simple and it’s the workflow professional photographers use: keep the CR2 as your master (“digital negative”), and convert a copy to JPG for sharing. Don’t delete the RAW if there’s any chance you’ll re-edit. For more on JPG’s lossy behavior, see why your JPEG looks blurry after saving.
Canon’s free route: Digital Photo Professional
Canon bundles a free RAW developer with its cameras — Digital Photo Professional (DPP) — and it converts CR2 to JPEG with full control over the raw development. Per Canon’s official knowledge base, the flow in DPP 4.x is:
- Open DPP and browse to the folder of CR2 files in the left panel.
- Select the image(s) you want to convert.
- Choose File ▸ Convert and save (use Batch process for many files).
- Set the Kind of file / file type to Exif-JPEG, choose an Image quality level, pick a destination, and save.
DPP’s advantage is that you can adjust brightness, white balance, and noise reduction before it renders the JPG — developing the RAW your way, not accepting the camera’s default. The downside is the install and learning curve. If you just need the JPG fast, or you’re not on your own machine, the online route below skips all of that.
Convert CR2 to JPG on xconvert
The xconvert CR2 to JPEG converter renders your Canon RAW to a standard image on our servers — nothing to install:
- Open xconvert.com/convert-cr2-to-jpeg and click Upload to add your CR2 (from your computer, Google Drive, or Dropbox). The page shows Supports: CR2.
- Confirm the output: open Advanced Options (the gear) and set the File extension to JPG (or JPEG — both are listed; they’re the same format).
- Leave the Quality Preset at Very High (Recommended) for a near-lossless render, or lower it to make a smaller file. You can also set Image resolution here if you want to downscale.
- Click Convert, then download your JPG.
Your file uploads over an encrypted connection, is processed on our servers, and is deleted automatically a few hours later — nothing lingers. Because the conversion happens server-side, it works the same on a Mac, a Windows PC, a Chromebook, or a phone, with no Canon software installed.
Converting a whole shoot, or a mix of Canon, Nikon, and Sony RAW? Use the multi-format Image Converter and see batch-convert RAW photos to JPG for the bulk workflow.
FAQ
What is a CR2 file and how do I open it?
A CR2 is a Canon RAW image — the unprocessed data from a Canon DSLR’s sensor (cameras from 2004 to 2018). It won’t open in most ordinary photo apps because RAW data has to be demosaiced and rendered first. Open it in Canon’s free Digital Photo Professional, in Adobe Lightroom/Camera Raw, or just convert it to JPG with the CR2 to JPEG converter to get a file that opens everywhere.
Will I lose quality converting CR2 to JPG?
You lose editing latitude, not visible quality. A JPG is 8-bit and lossy, while the CR2 holds 12–14-bit sensor data — so you give up highlight/shadow recovery and white-balance latitude. At a high quality setting the JPG looks indistinguishable from the RAW for viewing and printing. The fix: keep the original CR2 as your master and convert a copy.
Is CR2 the same as CR3?
No. CR2 (2004–2018) is the older Canon RAW format, built on TIFF; CR3 is the newer one Canon introduced in 2018 with its mirrorless EOS R / EOS M50 cameras, built on a different (ISOBMFF/MP4-family) container. They’re both “Canon RAW,” but they’re not interchangeable files — check which extension your camera writes.
How do I convert CR2 to JPG for free without Photoshop?
Use Canon’s free Digital Photo Professional (File ▸ Convert and save ▸ Exif-JPEG), which ships with Canon cameras — no Adobe license needed. Or, with nothing to install on any device, drop the file into the xconvert CR2 to JPEG converter, set the output to JPG, and convert.
Why is my CR2 file so big compared to a JPG?
Because it stores full-bit-depth raw sensor data (12–14 bits per channel, uncompressed or lossless-compressed) rather than a flattened, lossy 8-bit picture. That extra data is exactly what gives RAW its editing headroom — and exactly why the JPG render is much smaller and better for sharing.
Can I convert CR2 to JPG on my phone?
Yes. The xconvert CR2 to JPEG converter runs in any browser and processes the file on our servers, so you don’t need a desktop or any Canon software — upload the CR2 from your phone and download the JPG.
Sources
Last verified 2026-06-25.
- Wikipedia — Raw image format — CR2 is TIFF-based + lossless-JPEG, RAW files store 12–14 bits per channel, “raw development” / demosaicing turns sensor data into a viewable image, and CR3 (2018) uses the ISO base media file format container; cites manufacturer documentation.
- Canon USA Knowledge Base — Convert RAW images to JPEG or TIFF (Digital Photo Professional 4.x) — Canon’s own steps: File ▸ Convert and save ▸ Exif-JPEG, using the free DPP software bundled with Canon cameras.
- Canon Community — what is the CR2 image format? — Canon-user discussion of CR2 as Canon’s RAW format and its place in Canon’s lineup.
- Archive Team File Formats Wiki — Canon RAW 2 — CR2 history (introduced 2004 with the EOS-1D Mark II, replaced CRW), proprietary TIFF-based structure.
- xconvert CR2 to JPEG converter — live tool: Upload control, Advanced Options, File extension (JPG/JPEG), Quality Preset, and “Supports: CR2”, as shown on the page.