 By James
A form wants a photo at exactly 1200 × 628. You type both numbers into a resizer, hit go, and everyone in the picture comes back slightly wide and squat. Nothing malfunctioned — you asked a 4:3 photograph to become a 1.91:1 rectangle, and the only way to do that with two numbers is to squash it. This guide explains the mechanics behind that, which control to reach for when you need one dimension exact versus both, and the one step that gets you both numbers with no distortion at all.
Quick answer: You can only hit both an exact width and an exact height without stretching if the target’s aspect ratio matches your source’s. On xconvert’s image converter, Width (Keep aspect ratio) and Height (Keep aspect ratio) pin one dimension and compute the other, so nothing distorts. Width x Height forces both numbers and will stretch the picture when the ratios differ — that mode sends libvips a
!flag, which the libvips docs describe as forcing “the exact target size, breaking the aspect ratio”. And Preset Resolutions sets the HEIGHT: picking1080pmeans 1080 pixels tall, not wide. To get both numbers honestly, crop to the target ratio first, then resize.
Jump to a section
- Why two numbers can’t both be free
- The six resize modes and what each one does
- What you actually get: worked numbers
- Crop first, then resize — the no-distortion route
- Resize on xconvert
- FAQ
Why two numbers can’t both be free
An image has an aspect ratio — width divided by height. A 4000 × 3000 photo is 4:3, or 1.333. That ratio is a property of the picture, not of the file, and resizing cannot change it without changing the shape of everything inside the frame.
So when you specify a target, you are really choosing one of three things:
- One dimension exact, the other free. The resizer computes the second number from the ratio. Nothing distorts. This is what you want 90% of the time.
- Both dimensions exact, ratio ignored. The image is squeezed or stretched to fit. Circles become ellipses; faces get wide or narrow. This is almost never what you want, and it is what most “just type both numbers” tools do silently.
- Both dimensions exact, ratio preserved. Only possible if you first remove some of the picture — crop to the target ratio, then scale. This is the correct answer whenever a platform demands specific pixel dimensions.
The reason option 2 exists at all is that occasionally you genuinely need a fixed canvas and do not care about a few percent of distortion — a texture map, a UI asset, a placeholder. Knowing which mode you are in is the whole skill.
The six resize modes and what each one does
xconvert’s Image resolution group is on the page before you add anything, and offers six modes. They are not six flavours of the same thing:
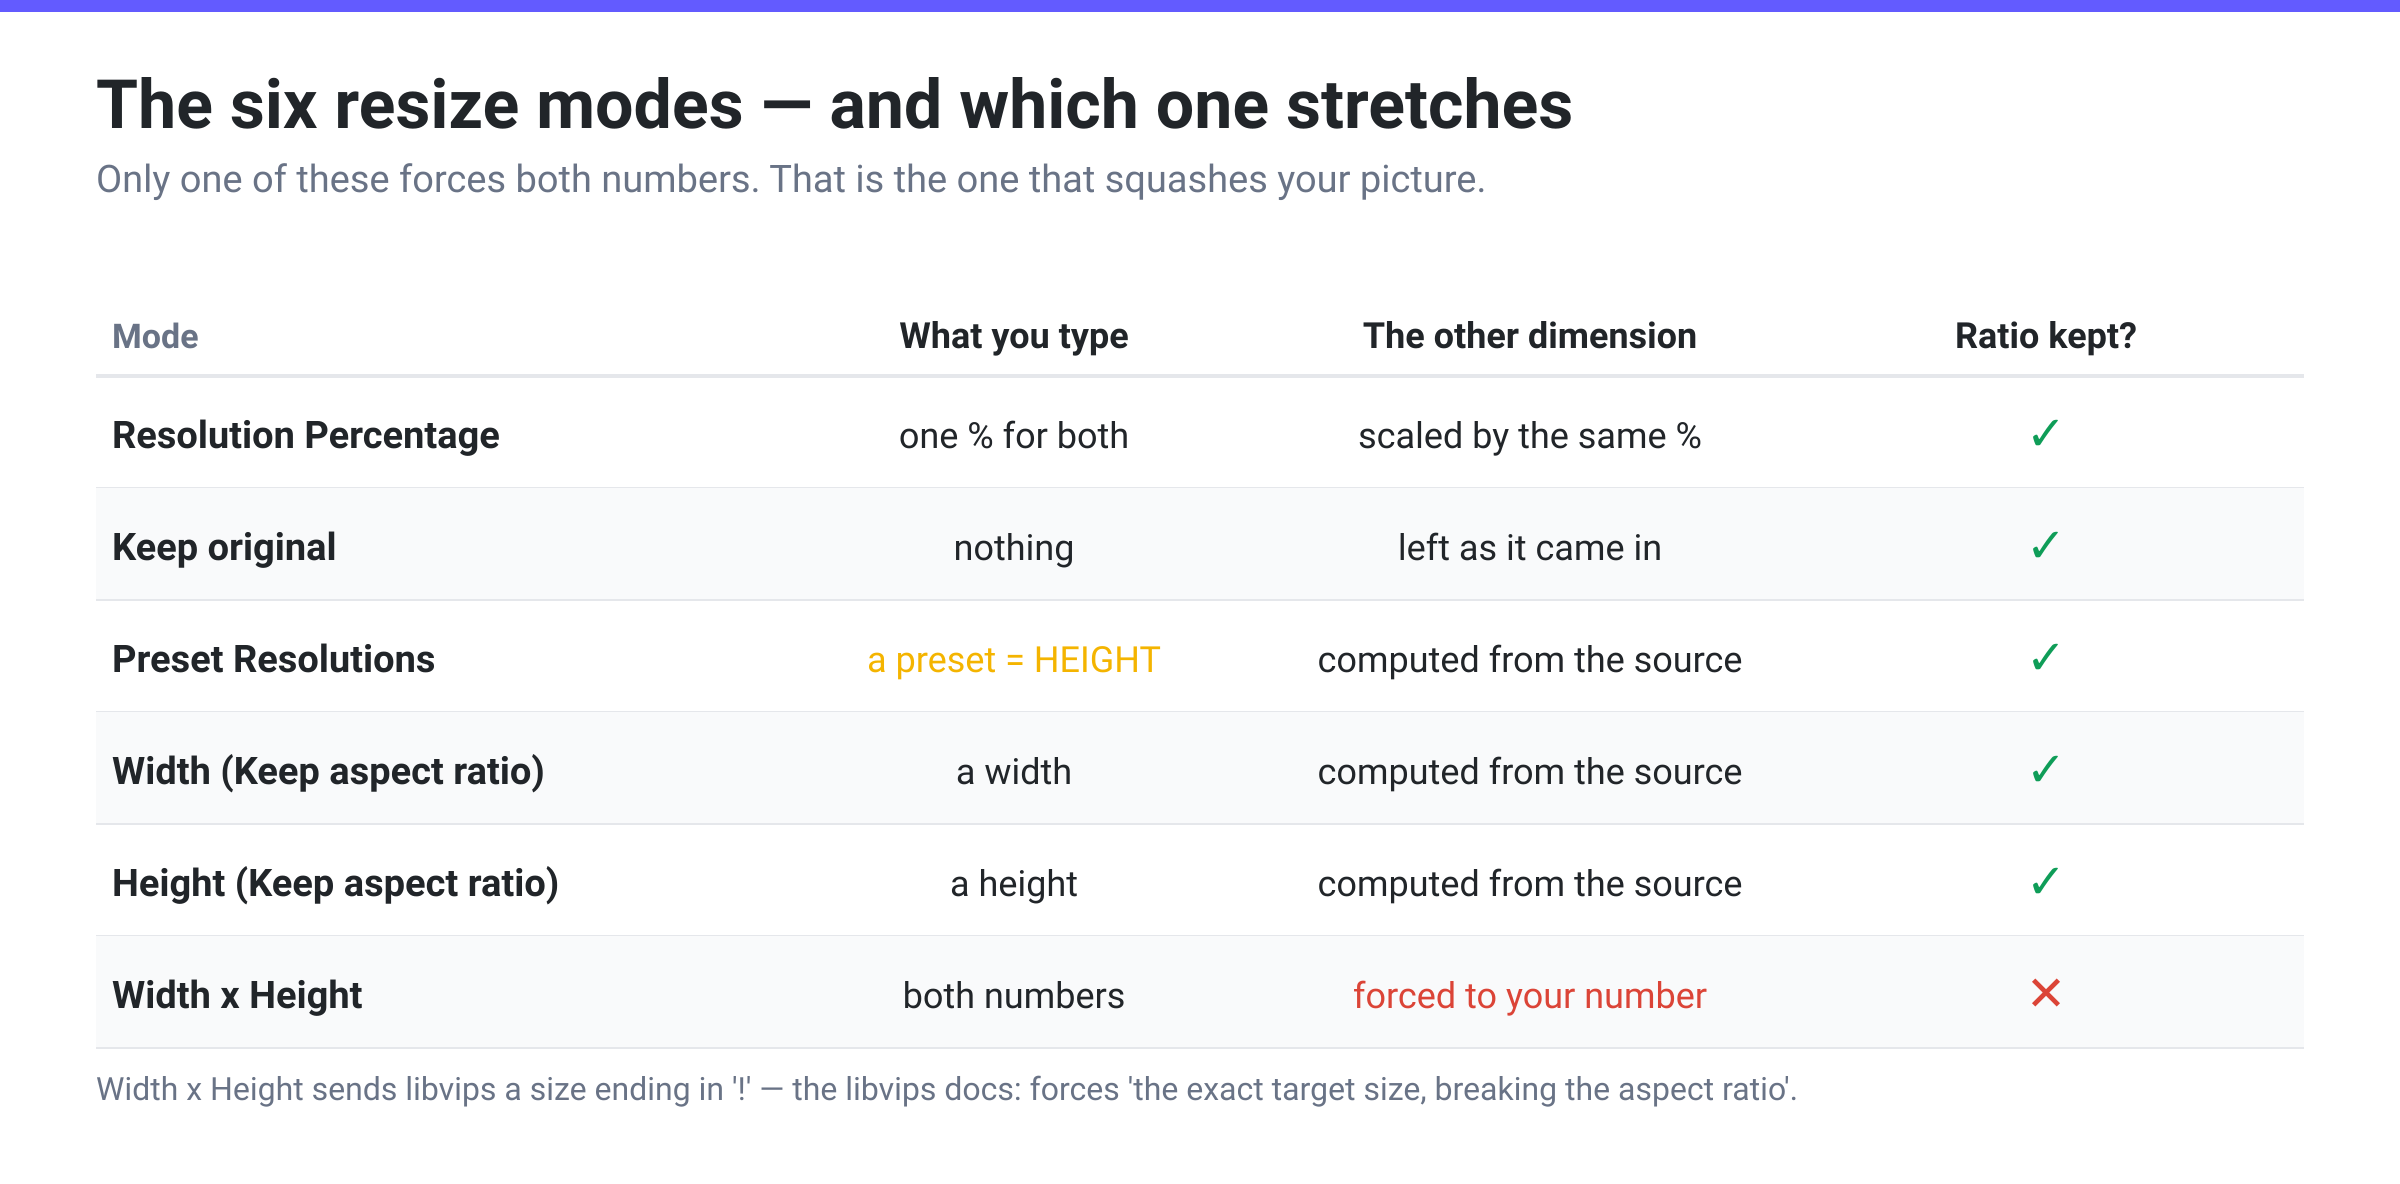
A few specifics worth having in front of you:
- Width (Keep aspect ratio) and Height (Keep aspect ratio) say so right in their labels. Pin one number; the other follows.
- Preset Resolutions offers a
Presetdropdown of4320p (8k),2160p (4k),1440p,1080p,768p,720pand so on down to16P. Thepis the giveaway: these are vertical line counts, exactly as in video. Choosing1080pgives you an image 1080 pixels tall with whatever width the ratio produces. If you needed 1080 pixels wide, this is the wrong control — use Width instead. - Resolution Percentage scales both dimensions by the same percentage, so it is aspect-safe by construction. Good for “make everything half size”; useless for hitting a specific pixel number.
- Keep original is the default: it leaves the pixel dimensions exactly as they came in, which is what you want when you are only changing format or compression.
- Width x Height is the only mode with no “keep aspect ratio” in its name, and that omission is the documentation. It forces both values.
The unit trap. The Width and Height fields have a unit dropdown alongside them offering Pixels and Percent (%) — and the field opens at 75 with Percent (%) preselected. Type 1200 without touching that dropdown and you have asked for 1200 percent, a twelvefold enlargement. Switch the unit to Pixels before you type the number. This is the single most common way an exact-dimensions resize goes wrong.
What you actually get: worked numbers
Take a 4000 × 3000 photo — an ordinary 4:3 camera or phone shot — and ask for each of these:
| What you want | Mode to use | What you get |
|---|---|---|
| 1200 px wide, undistorted | Width (Keep aspect ratio) = 1200 Pixels | 1200 × 900 |
| 1080 px tall, undistorted | Height (Keep aspect ratio) = 1080 Pixels | 1440 × 1080 |
| “1080p” | Preset Resolutions → 1080p | 1440 × 1080 — the preset set the height |
| Half size | Resolution Percentage = 50 | 2000 × 1500 |
| Exactly 1200 × 628 | Width x Height = 1200 × 628 Pixels | 1200 × 628, visibly squashed |
| Exactly 1200 × 628, undistorted | Crop to 1.91:1 first, then Width = 1200 | 1200 × 628, correct |
And because the second number is always the ratio’s decision, here is what different sources produce for the same request:
| Source aspect ratio | Typical source | Height set to 1080 gives | Width set to 1200 gives |
|---|---|---|---|
| 1:1 (square) | 2000 × 2000 | 1080 × 1080 | 1200 × 1200 |
| 4:3 | 4000 × 3000 | 1440 × 1080 | 1200 × 900 |
| 3:2 (most DSLRs) | 6000 × 4000 | 1620 × 1080 | 1200 × 800 |
| 16:9 | 3840 × 2160 | 1920 × 1080 | 1200 × 675 |
| 9:16 (phone portrait) | 1080 × 1920 | 608 × 1080 | 1200 × 2133 |
Read the 9:16 row twice. Setting a width of 1200 on a portrait phone photo produces something 2133 pixels tall — larger than the original in one direction. If a size limit is what you are chasing, how to resize an image for the web covers the dimensions-versus-file-size distinction properly.
Crop first, then resize — the no-distortion route
When a platform insists on exact pixel dimensions, do it in two passes:
- Work out the target ratio. Divide the required width by the required height. 1200 ÷ 628 = 1.91. 1080 ÷ 1080 = 1.0. 1280 ÷ 720 = 1.78.
- Crop the source to that ratio with xconvert’s image cropper, choosing which part of the picture to keep. This is the step that decides what gets sacrificed — and you should decide it, not an algorithm that squashes the whole frame instead.
- Resize the cropped file with Width (Keep aspect ratio) set to the required width in Pixels. Because the ratio now matches, the height lands on the required number automatically.
Two practical notes. Crop before you scale down, not after: cropping a 4000 px original leaves far more pixels to work with than cropping a 1200 px reduction. And don’t upscale to hit a minimum — enlarging past the original resolution invents pixels and looks soft; if a portal demands 2000 px from a 1200 px source, re-shoot or re-export from the original rather than stretching. For the quality side of downscaling, see how to resize an image without losing quality on Windows 11.
Resize on xconvert
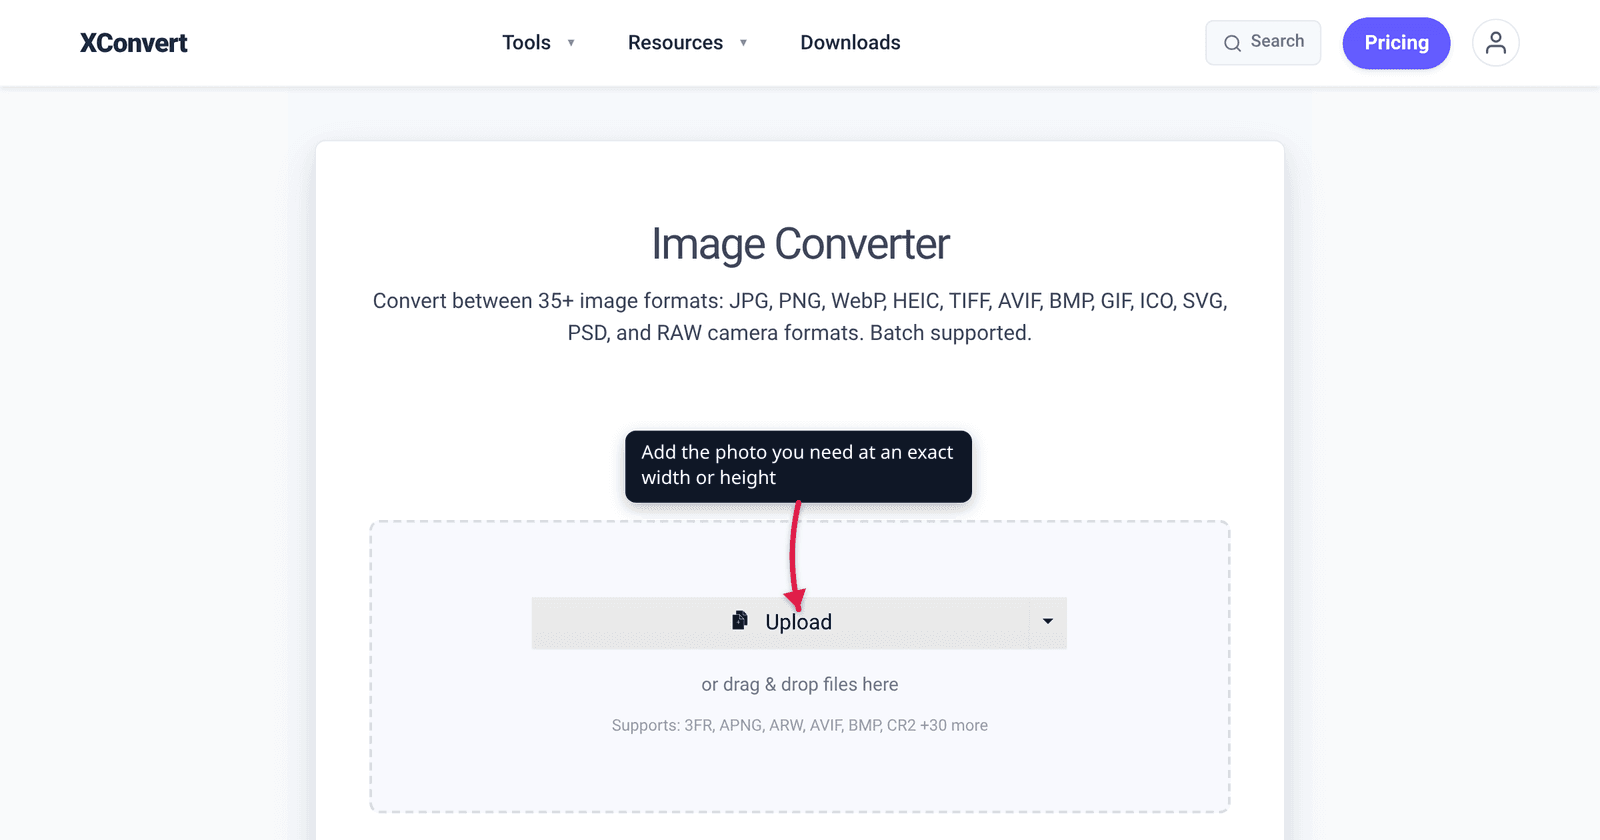
- Open xconvert.com/image-converter and click Upload to add your file — from your computer, Google Drive or Dropbox.
- Scroll to the Image resolution group. It is rendered on the page from the start, so you can set it before or after the file goes up.
- Choose your mode: Width (Keep aspect ratio) or Height (Keep aspect ratio) for one exact dimension, Preset Resolutions to pick a standard height, Resolution Percentage to scale proportionally, or Width x Height only when you deliberately want both numbers forced.
- Set the unit dropdown to
Pixels. It opens on Percent (%) with a value of 75, so this is the step to do before typing anything. - Type your number. If you picked Width, leave the height alone — it is being computed for you.
- Check the output format. The Image File Extension dropdown at the top of the panel opens on JPG, so a PNG resized without touching it comes back as a JPEG — and with the transparency flattened. Set it to match your source unless you actually want the conversion.
- If the file also needs to be smaller in bytes, use the separate Image Compression group, which on this converter offers two modes: Quality Preset and Specific file size.
- Convert and download the result.
Your file uploads over an encrypted connection, is processed on our servers, and is deleted automatically a few hours later.
FAQ
How do I resize an image to exact dimensions without stretching it?
Crop to the target aspect ratio first, then set just one dimension. Divide your required width by your required height to get the ratio, crop the source to that shape with the image cropper, then use Width (Keep aspect ratio) in Pixels to set the width. The height lands on the required number by itself, because the ratio already matches. Typing both numbers into Width x Height will hit both figures but squash the picture.
Why does my image look squashed after resizing?
Because you used a mode that forces both dimensions. On xconvert that is Width x Height; the underlying resize sends libvips a size argument ending in !, which the libvips documentation describes as forcing “a resize to the exact target size, breaking the aspect ratio”. Switch to a single-dimension mode, or crop first.
What does “1080p” mean in the Preset Resolutions dropdown?
1080 pixels of height. The presets use the video convention where the number is the vertical line count — 1080p, 720p, 480p and so on. A 4:3 photo set to 1080p comes out 1440 × 1080; a 16:9 photo comes out 1920 × 1080. If what you need is 1080 pixels across, use Width (Keep aspect ratio) and type 1080 instead.
I typed 1200 in the Width box and got a huge image. What happened?
The unit dropdown was still on Percent (%), its default, so you asked for 1200% — twelve times the original width. The Width and Height fields open at a value of 75 with Percent selected, which is convenient for “make it three-quarters” and a trap for exact pixel work. Change the unit to Pixels first, then type your number.
Should I set width or height when I only care about one of them?
Set the one your constraint actually names. Web layouts and content columns are usually width-constrained, so set Width. Video-adjacent and gallery contexts are usually height-constrained, so set Height — or use a preset, since those set height anyway. When a rule says “no larger than 1200 × 1200”, set whichever of your image’s dimensions is longer; the other will come in under the limit automatically.
Does resizing to exact dimensions reduce the file size too?
Usually yes, because fewer pixels means less data — and the saving is quadratic, so halving both dimensions leaves roughly a quarter of the pixels. But dimensions and bytes are separate controls: the Image Compression group on the same page is what you use when a portal caps the file size in KB rather than the picture in pixels. On this converter it offers Quality Preset and Specific file size — type the cap straight into Specific file size. The two percentage-based modes (Target file size (%) and Image Quality (%)) are not shown here; they appear on the dedicated compressor pages such as Compress JPG instead.
Sources
Last verified 2026-08-31.
- libvips — Using vipsthumbnail — the
--sizebehaviour behind the resize modes:200x“will resize to 200 pixels across, no matter what the height of the input image is”, and “You can append!to force a resize to the exact target size, breaking the aspect ratio.” - xconvert Image Converter — the live control names and defaults quoted here: the Upload button, the six Image resolution modes (Resolution Percentage, Keep original, Preset Resolutions, Width (Keep aspect ratio), Height (Keep aspect ratio), Width x Height), the Preset list, the two Image Compression modes shown on a convert page (Quality Preset and Specific file size), and the dimension field opening at 75 with Percent (%) preselected.
- xconvert Crop Image — the crop-to-ratio step in the two-pass workflow.