 By Stephanie Taylor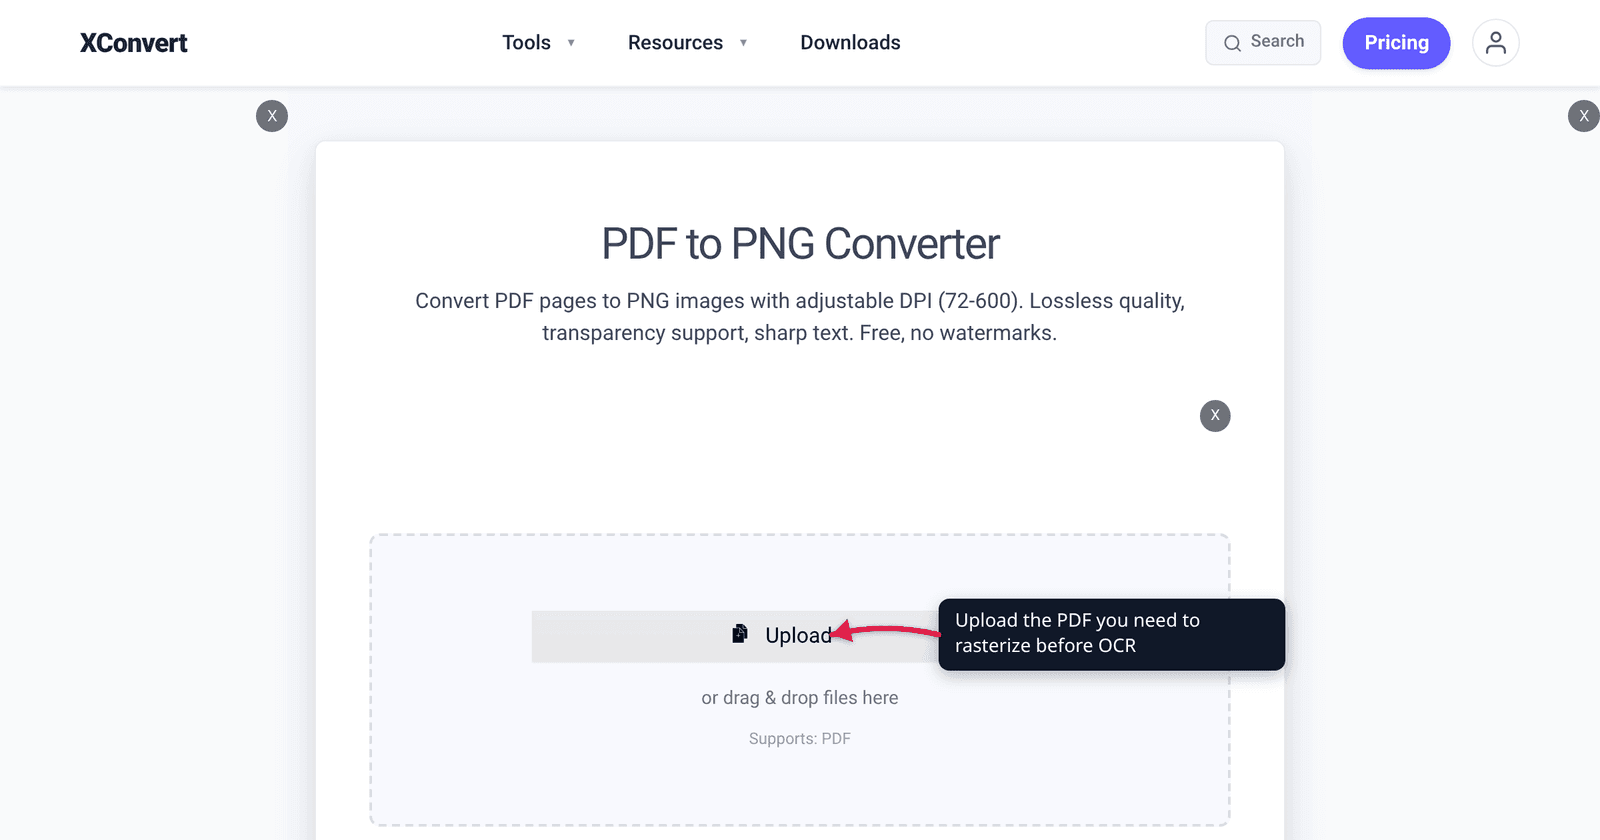
You have a 60-page scanned contract and an OCR pipeline waiting for it — Tesseract on your laptop, or Textract, Document AI or Azure Document Intelligence in the cloud. All of them want images, not a PDF blob, so the first step is rasterizing the pages. The DPI you pick right there sets your accuracy ceiling: too low and the smallest text falls under the engine’s own detection floor; too high and you blow past hard pixel caps that make the engine reject the file outright. Here is what the four major engines actually publish about resolution, and how to turn it into one number you set once.
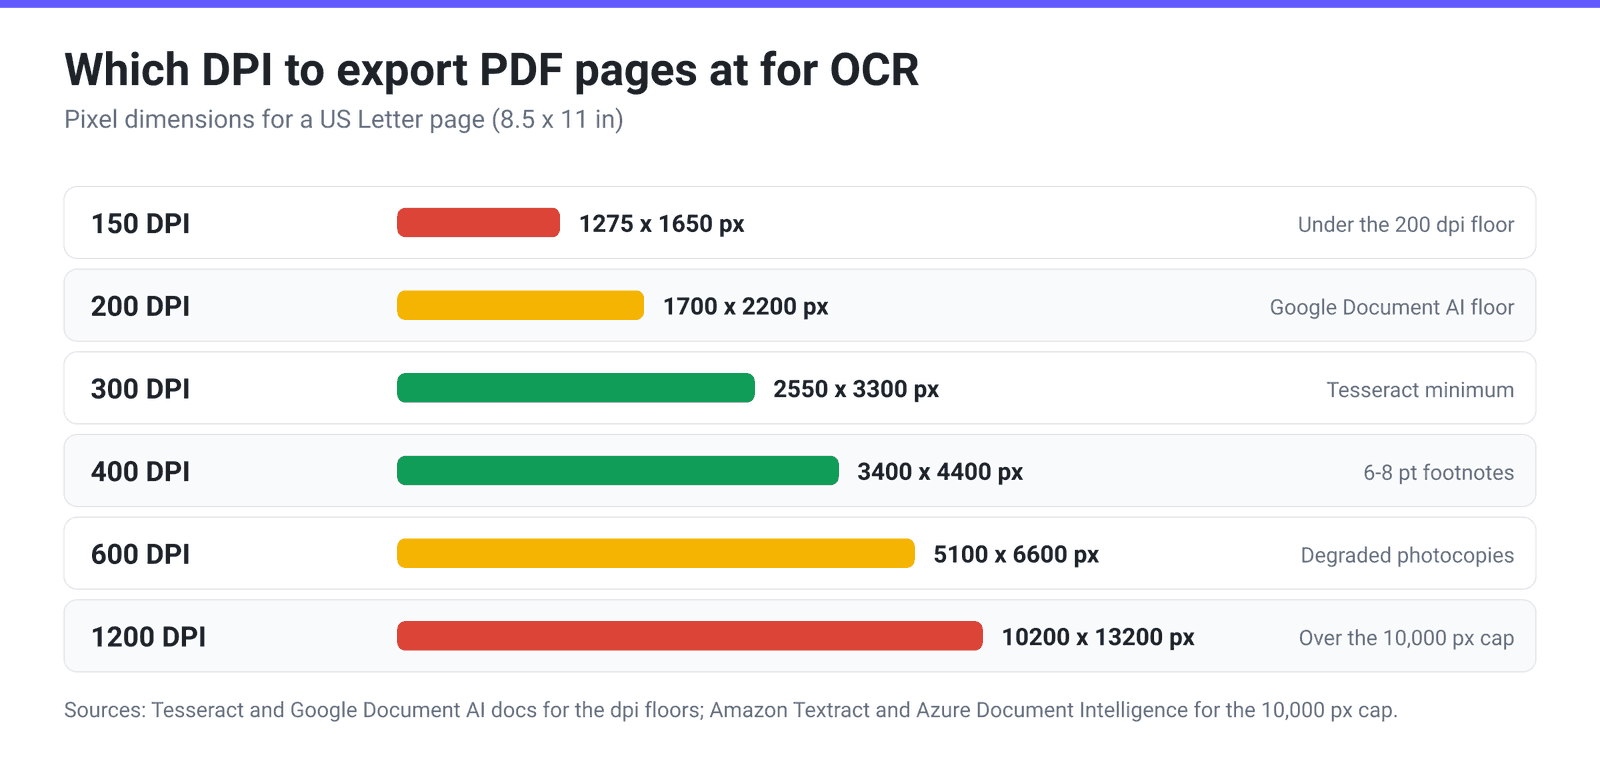
Quick answer: Export at 300 DPI for ordinary documents — it is the figure Tesseract’s own docs name as the minimum, and Google Document AI calls 300 dpi and higher its best-results range. Go to 400 DPI when the smallest type on the page is 6–8 pt (footnotes, dense tables, contract riders), and 600 DPI only for degraded or generational photocopies. Do not use 1200 DPI: a US Letter page renders at 10,200 × 13,200 px, which exceeds the 10,000-pixel-per-side limits that both Amazon Textract and Azure AI Document Intelligence document. And to be clear about what happens where — xconvert renders your PDF pages into images; it does not run OCR. The recognition step happens in the tool you hand the images to.
Jump to a section
- What the OCR engines themselves require
- The real rule is pixels per character, not DPI
- When 400 or 600 DPI earns its file size
- Format, background and colour choices that help the binarizer
- We render the pages. We do not read them.
- Export PDF pages at OCR-ready DPI on xconvert
- FAQ
What the OCR engines themselves require
Skip the folklore and go to the docs. Every major engine publishes a resolution floor, a minimum text height, or hard input caps — and they do not all agree.
| Engine | Stated resolution guidance | Minimum text height | Hard input caps |
|---|---|---|---|
| Tesseract (open source) | “Tesseract works best on images which have a DPI of at least 300 dpi, so it may be beneficial to resize images.” | Not published as a pixel figure | None — local, bounded by your machine |
| Google Document AI | “For most accurate OCR results from Document AI, document scans should be a minimum of 200 dpi”; 300 dpi and higher generally best | Not published as a pixel figure | See Document AI quotas |
| Amazon Textract | Not published as a DPI floor | “The minimum height for text to be detected is 15 pixels. At 150 DPI, this would be the same as 8 point font.” | ≤10,000 px on all sides; 10 MB synchronous; async PDF/TIFF 500 MB / 3,000 pages |
| Azure AI Document Intelligence (Read) | Not published as a DPI floor | “The minimum height of the text to be extracted is 12 pixels for a 1024 x 768-pixel image… about 8-point text at 150 dots per inch.” | 50 × 50 px to 10,000 × 10,000 px; 500 MB paid tier / 4 MB free tier; up to 2,000 pages |
Two things jump out. The cloud engines express the requirement as pixels of glyph height, not DPI — because DPI alone is meaningless without knowing how big the type is. And both AWS and Microsoft publish a 10,000-pixel ceiling per side: not a recommendation, but the shape of input they accept.
The real rule is pixels per character, not DPI
DPI is a ratio, not a size. What the recognizer sees is the number of pixels the letter occupies. Convert between them with one line of arithmetic: a point is 1/72 of an inch (the W3C defines 1pt = 1/72nd of 1in, and PDF’s own default user-space unit is the same 1/72 inch), so:
em height in pixels = point size ÷ 72 × DPI
| Type size on the page | 150 DPI | 200 DPI | 300 DPI | 400 DPI | 600 DPI |
|---|---|---|---|---|---|
| 6 pt — fine print, legal riders | 13 px | 17 px | 25 px | 33 px | 50 px |
| 8 pt — footnotes, table cells | 17 px | 22 px | 33 px | 44 px | 67 px |
| 10 pt — dense body text | 21 px | 28 px | 42 px | 56 px | 83 px |
| 12 pt — standard body text | 25 px | 33 px | 50 px | 67 px | 100 px |
Line that up against the published floors. Textract wants at least 15 px; Azure wants at least 12 px. At 150 DPI, 6 pt fine print lands at 13 px — under one floor, barely over the other. That is why a footnote-heavy page OCRs badly at a resolution where the body copy reads perfectly.
Leave headroom, too: those figures are the em box, and the ink of a lowercase letter is a fraction of it — an x-height is typically about half the em. A number that merely clears the documented minimum will fail on the first slightly blurry scan. Treat 300 DPI as the working floor for 10–12 pt text and 400 DPI as the floor for anything smaller.
When 400 or 600 DPI earns its file size
Doubling DPI quadruples the pixel count, and roughly the file size with it. So the honest question is not “does more resolution help?” but “does this page have detail that 300 DPI is throwing away?”
Go above 300 DPI when:
- The smallest type you need is 6–8 pt — footnotes, terms-and-conditions blocks, table cells, drawing callouts.
- The source is a photocopy of a photocopy or a fax-quality scan with eroded glyphs. Extra sampling gives the binarizer more to work with on broken strokes.
- The page has fine line work the recognizer must separate from text — ruled tables, boxed character fields, stamps over type.
- You are digitizing for archive and this is the only pass you will ever make.
Stay at 300 DPI (or lower) when:
- It is clean, machine-printed 10–12 pt body text on white. You are already well above every published floor.
- You are batching hundreds of pages against a per-request size limit. Textract’s synchronous path caps at 10 MB and Azure’s free tier at 4 MB.
- The PDF is born-digital with a real text layer. Then the fastest, most accurate “OCR” is not OCR at all — extract the text directly.
Never use 1200 DPI for OCR. A US Letter page (8.5 × 11 in) at 1200 DPI is 10,200 × 13,200 px, and A4 is 9,921 × 14,031 px. Both bust the 10,000-px-per-side limit Textract and Azure Document Intelligence publish. That preset exists for fine-art and prepress work.
Format, background and colour choices that help the binarizer
DPI is the big lever, but three smaller decisions change how clean the input is:
Use a lossless format. JPEG’s block transform smears ringing artefacts around exactly the high-contrast edges that define a glyph. PNG and TIFF store the rasterizer’s output pixel-for-pixel. All four engines accept PNG, and all four accept TIFF as well — with fine print worth knowing: Textract only handles multi-page TIFF through its asynchronous path (the synchronous one caps at a single page), Document AI rejects TIFFs that use the old JPEG-in-TIFF compression, and Tesseract’s TIFF support depends on the binary having been built against libtiff, which mainstream builds are.
Flatten transparency to white. If a page carries an alpha channel and you export a transparent PNG, whatever consumes it decides what “nothing” looks like — and plenty of pipelines composite onto black, at which point black text vanishes. An explicit white background removes the ambiguity.
Leave the colour palette alone. Reducing to a small indexed palette with dithering is a tempting way to shrink files, but dithering scatters isolated pixels through what should be flat paper, and the binarizer then has to decide whether each one is ink. Tesseract binarizes internally (Otsu by default, with Adaptive Otsu and Sauvola added in 5.0.0), and does that better from a smooth greyscale image. If you need smaller files, drop DPI instead.
We render the pages. We do not read them.
One label on our own tool needs explaining. In Conversion Quality, the 400 DPI option reads 400 DPI (Small Text / OCR). That describes what the render is good for — it is not an OCR feature. xconvert converts, compresses and reorganises files; it does not perform optical character recognition, and no setting on the page produces a text file or a searchable PDF.
So it is two tools, not one: rasterize here, at the DPI your smallest type demands, then recognize there. Reasonable destinations: Tesseract if you want it free, local and scriptable; Google Document AI, Amazon Textract or Azure AI Document Intelligence for a managed API with layout and table extraction; or the OCR built into Adobe Acrobat or macOS Preview’s Live Text if you just need one document searchable without writing code.
Export PDF pages at OCR-ready DPI on xconvert
The PDF to PNG converter exposes the render DPI directly, which is the setting that matters here:
- Open xconvert.com/convert-pdf-to-png and drag your PDF onto the drop zone, or click Upload to browse. Batch upload works — every page of every file becomes its own PNG.
- Expand Advanced Options.
- Under Conversion Quality, pick your DPI. The default is 300 DPI (High Quality / Print Recommended); switch to 400 DPI (Small Text / OCR) when the page has 6–8 pt type, or 600 DPI (Ultra High / Archival) for degraded scans. Skip 1200 DPI — it breaks the cloud engines’ pixel caps.
- Under Image Transparency, leave Color on White so pages arrive flattened rather than carrying an alpha channel your OCR tool has to interpret.
- Leave Image resolution on Keep original and Colors on ORIGINAL — downscaling or palette-reducing undoes the DPI you just chose.
- Click Convert, download the PNGs, and hand them to your OCR engine.
Your file uploads over an encrypted connection, is processed on our servers, and is deleted automatically a few hours later.
Two related reads: What DPI Do You Need? Web vs Print untangles DPI versus pixels generally, and Why Is My Scanned PDF So Big? covers the opposite problem — a scan already at high resolution that needs to shrink.
FAQ
Is 300 DPI enough for OCR, or should I always use 600?
For clean, machine-printed 10–12 pt text, 300 DPI is enough — it is the minimum Tesseract’s own documentation names, and it puts 12 pt type at roughly 50 px of em height, far above the 12–15 px floors AWS and Microsoft publish. 600 DPI earns its place when the smallest type is under about 8 pt, or the scan is a degraded photocopy. Past that you pay in file size and per-request limits without a matching accuracy gain.
Does xconvert do OCR?
No. xconvert rasterizes PDF pages into images and converts between formats; it does not extract text or produce a searchable PDF. The 400 DPI (Small Text / OCR) label in Conversion Quality names a render quality that suits OCR input — it does not run the recognition. Use Tesseract, Google Document AI, Amazon Textract, Azure AI Document Intelligence, or the OCR built into Acrobat or macOS Preview for that step.
Why did my OCR service reject a high-resolution page?
Usually a hard input cap rather than the image itself. Amazon Textract supports images at 10,000 px or less on every side; Azure AI Document Intelligence accepts 50 × 50 px up to 10,000 × 10,000 px. A US Letter page at 1200 DPI is 10,200 × 13,200 px and fails both. Size caps bite too: Textract’s synchronous path is 10 MB, and Azure’s free (F0) tier caps documents at 4 MB against 500 MB on the paid tier.
My PDF already has selectable text. Do I still need to rasterize it?
No, and you should not. Selectable text means the PDF contains real glyphs you can extract directly — faster, and with none of OCR’s error rate. Rasterizing a born-digital PDF and recognizing the pixels throws away perfect data and replaces it with a guess. Rasterize only when the PDF is a scan, a photograph, or a flattened export with no text layer.
Should I export greyscale, colour, or black and white?
Greyscale or colour — let the engine binarize. Tesseract applies Otsu thresholding internally, with Adaptive Otsu and Sauvola available since 5.0.0, and it decides better with full tonal information than from an image you already crushed to two levels. Hard-thresholding early is the classic way to lose thin strokes on a faded scan.
Sources
Last verified 2026-08-31.
- Tesseract — Improving the quality of the output — the 300 dpi minimum; internal Otsu / Adaptive Otsu / Sauvola binarization.
- Tesseract — Input formats — Leptonica-backed PNG (“requires libpng, libz”) and TIFF (“requires libtiff, libz”) reading.
- Google Cloud Document AI — Supported files — the 200 dpi minimum, 300 dpi and higher for best results; the supported-type table listing
.pngand.tiff/.tif, and the note that “Prior JPEG compressions for TIFF are unsupported.” - Amazon Textract — Set quotas — 15 px minimum text height, the ≤10,000 px per-side limit, the 10 MB / 500 MB / 3,000-page caps, and “Operations support JPEG, PNG, PDF, and TIFF files” with TIFF limited to one page on the synchronous path.
- Azure AI Document Intelligence — Read model input requirements — 12 px minimum text height, 50 × 50 to 10,000 × 10,000 px, 2,000 pages, 4 MB free / 500 MB paid.
- W3C CSS Values and Units Module Level 4 —
1pt = 1/72nd of 1in, the constant behind the point-size table.